|
STEP 1
|
(Enlarge)
|
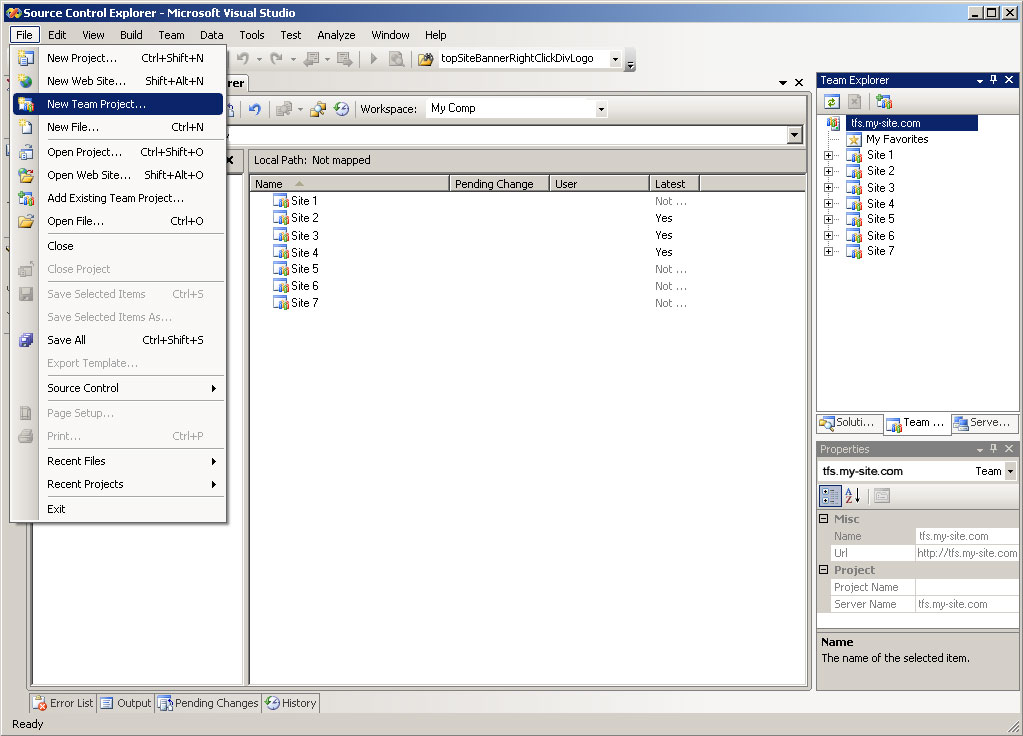
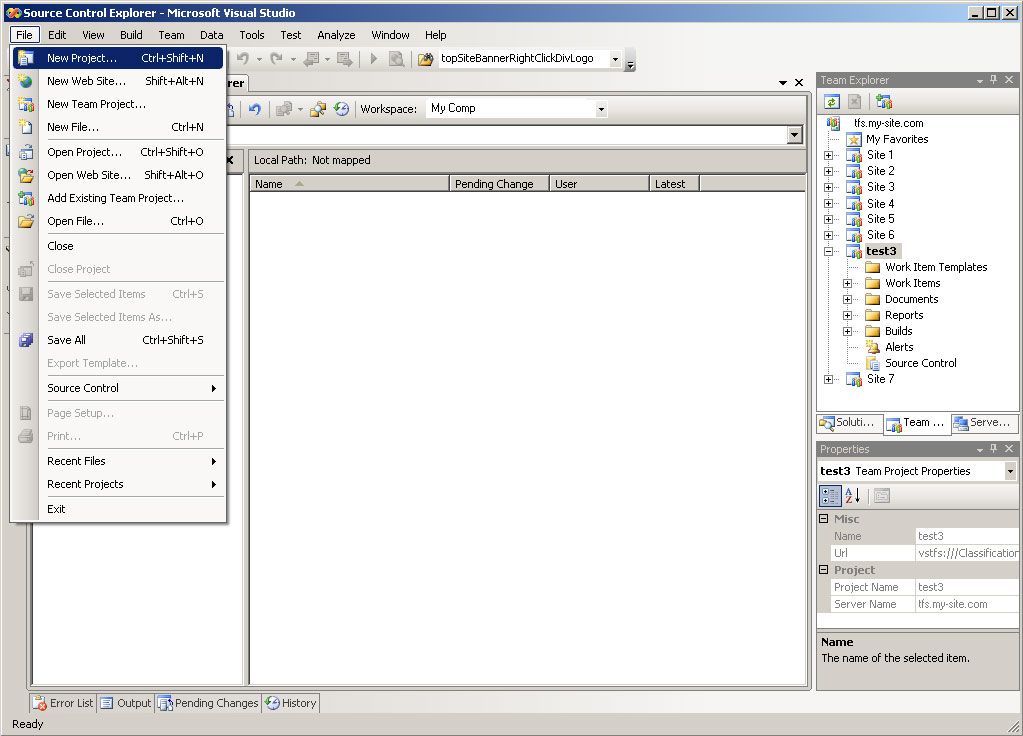
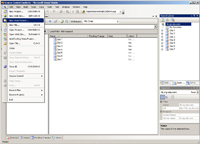
- Under "File" select "New Team Project"
|
|
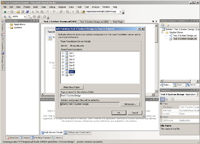
STEP 2
|
(Enlarge)
|
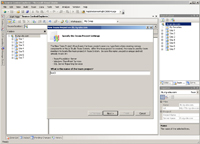
- Specify an appropriate name for the project
- Click the "Next" button
|
|
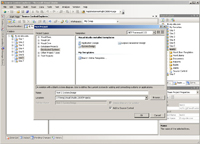
STEP 3
|
(Enlarge)
|
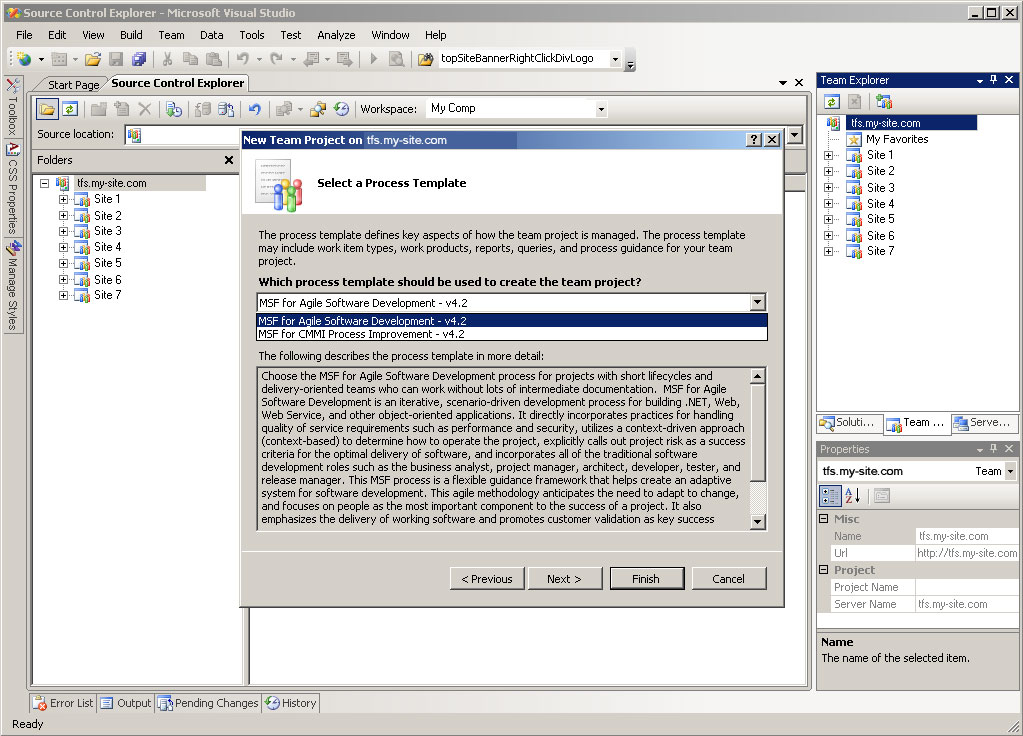
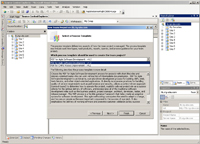
- Select process template to use
|
|
STEP 4
|

(Enlarge)
|
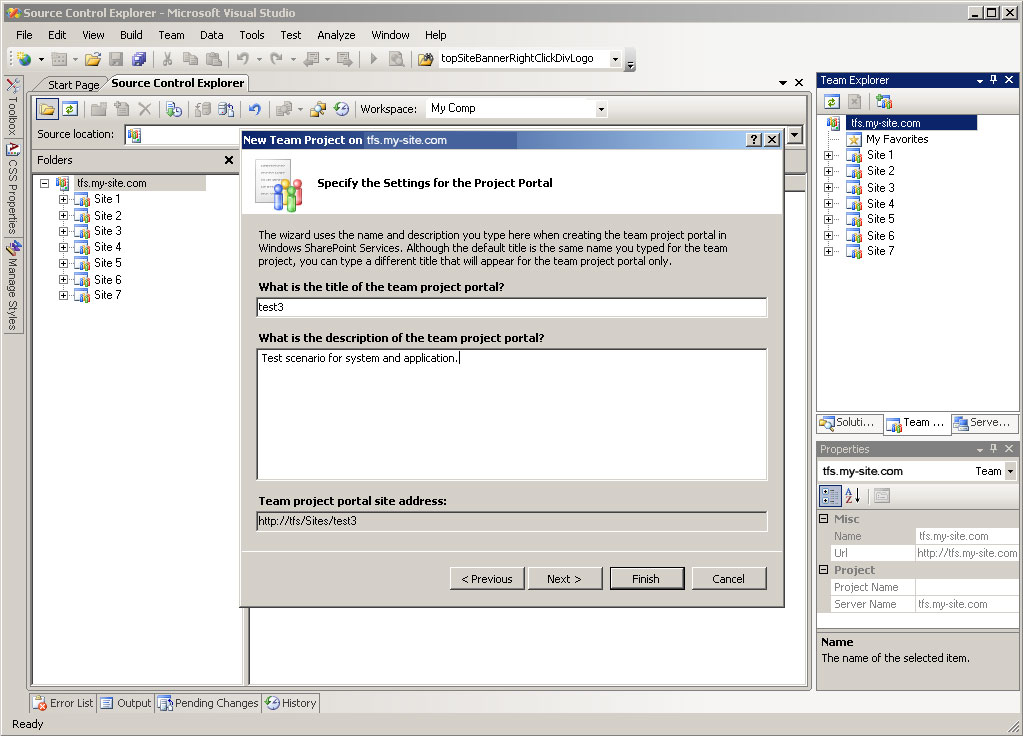
- Specify a name for the team project. This will be visible in areas such as the Team Explorer and the Source Control Explorer
- Provide a concise description for the team project
|
|
STEP 5
|
(Enlarge)
|
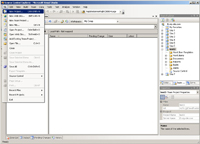
- Now that the team project has been created, the actual solution where our work will be done needs to be created
- Under "File" select "New Project..."
|
|
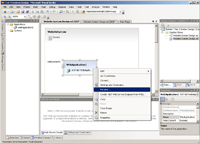
STEP 6
|
(Enlarge)
|
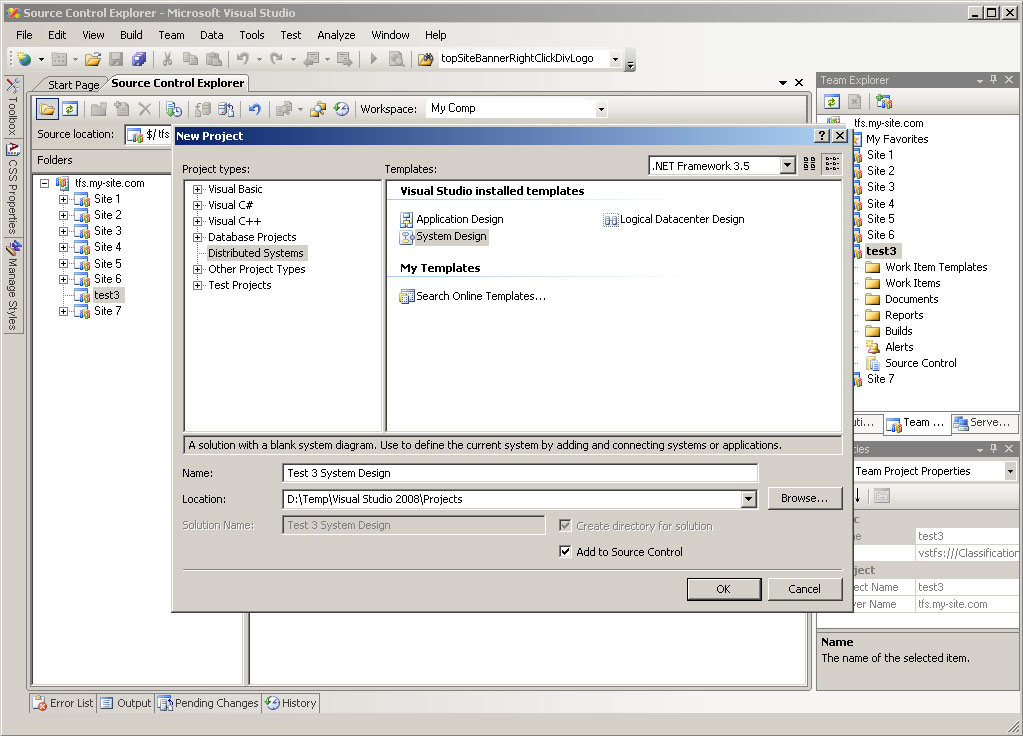
- Under "Project Types:" select "Distributed Systems"
- Under "Templates:" select "System Design"
- IMPORTANT: Notice "Add To Source Control" is checked. This allows source control to be enforced.
|
|
STEP 7
|
(Enlarge)
|
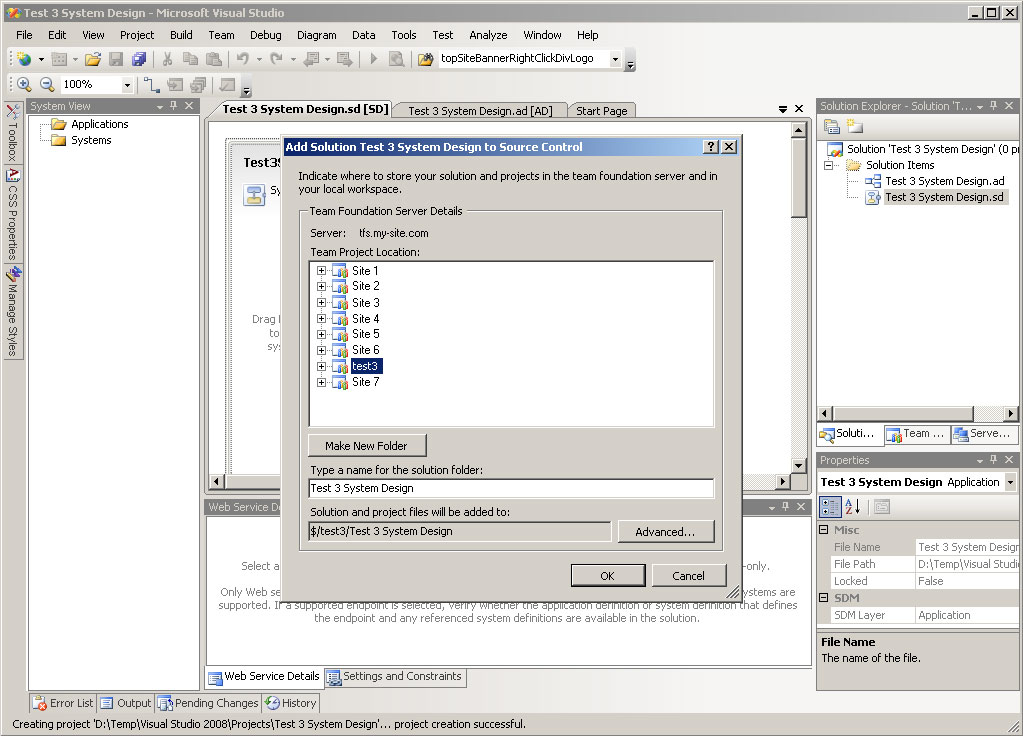
- Select the team project the solution will be filed under
|
|
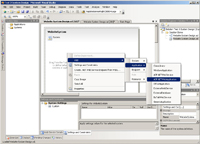
STEP 8
|
(Enlarge)
|
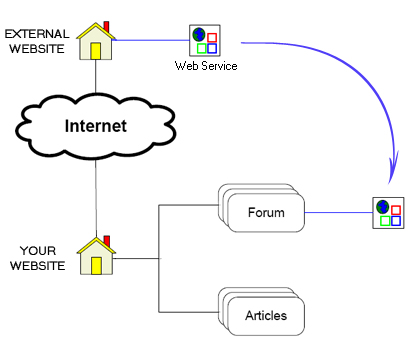
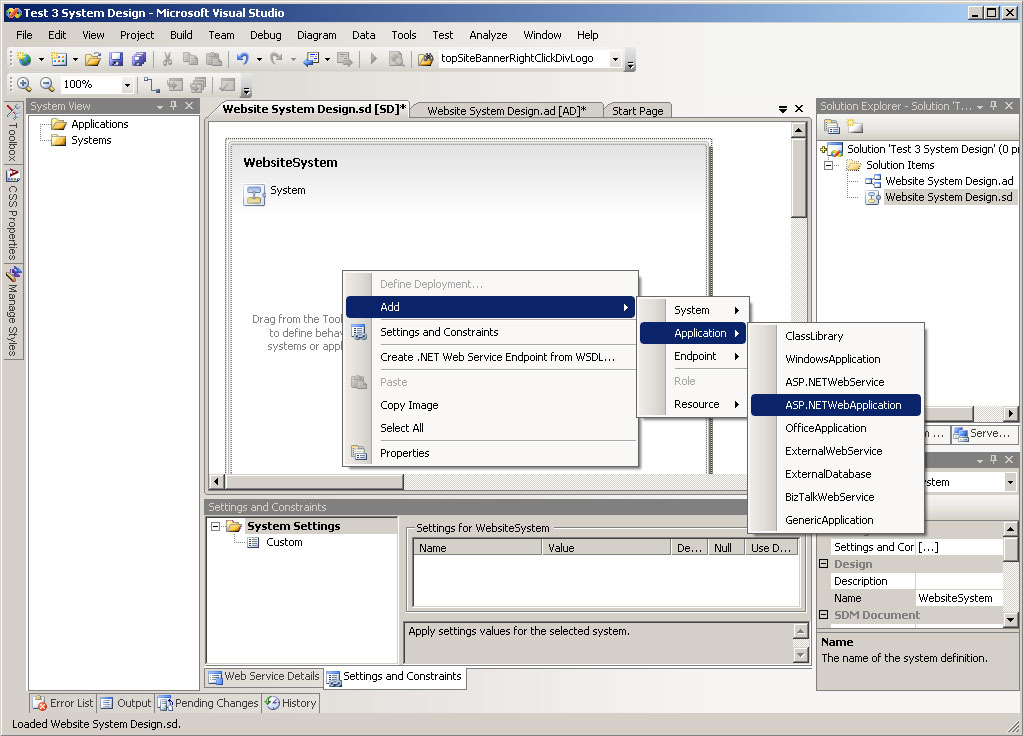
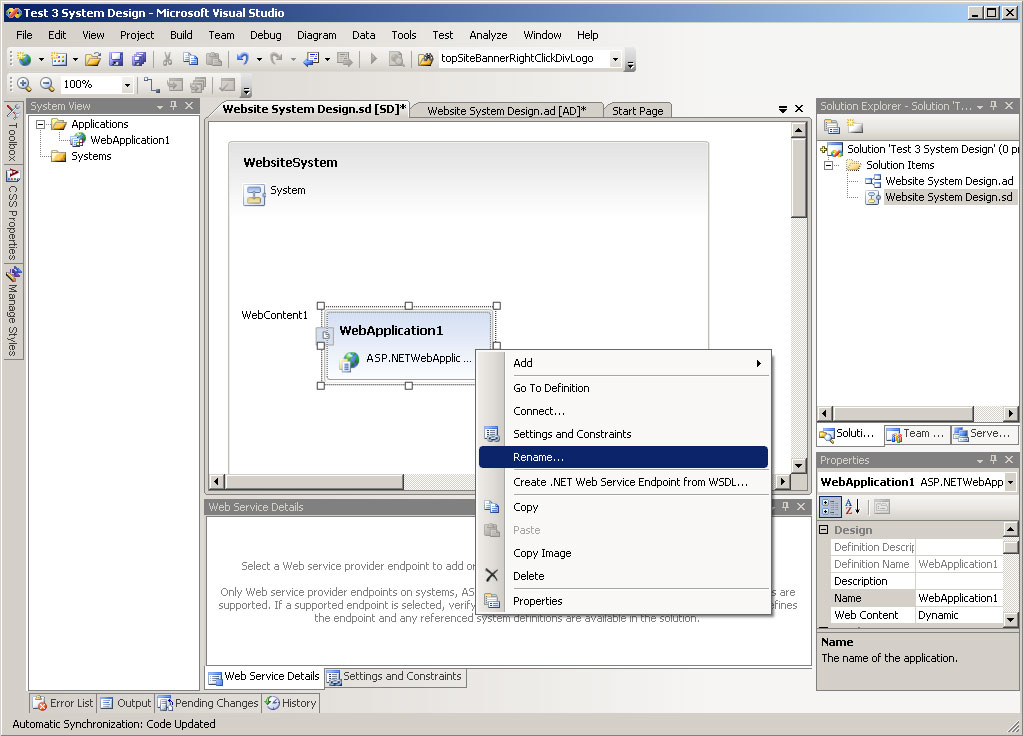
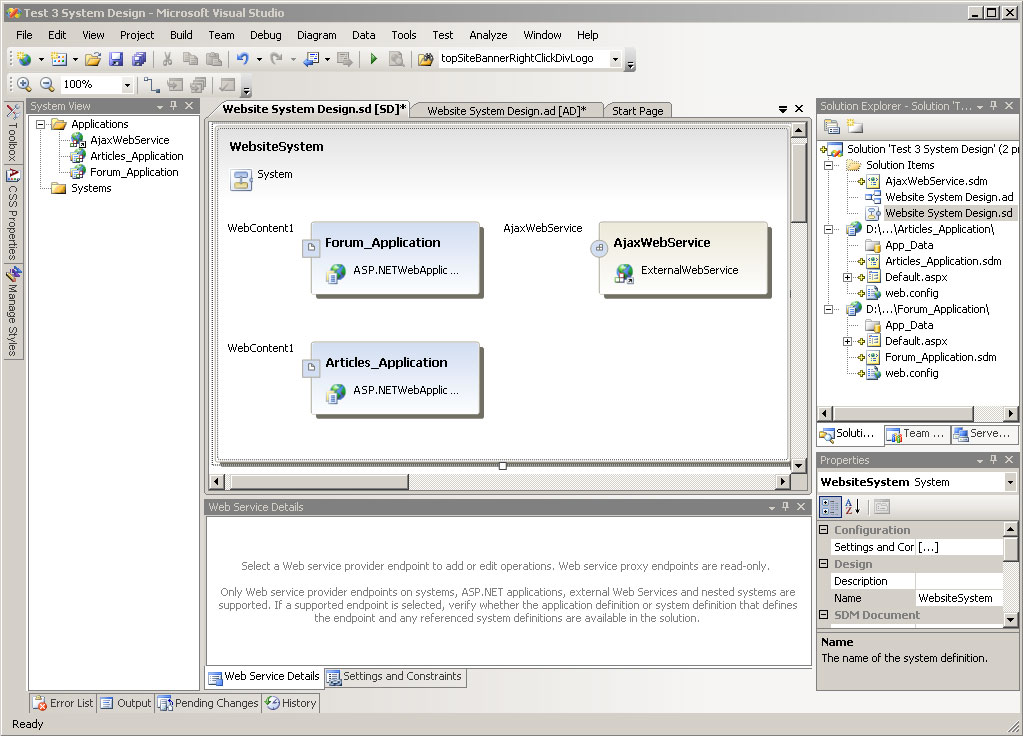
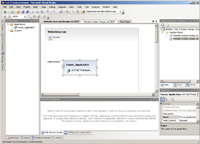
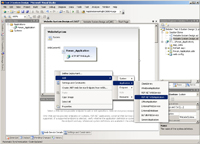
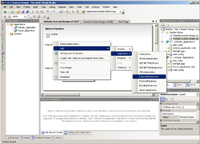
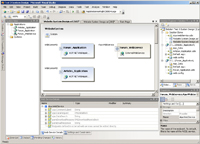
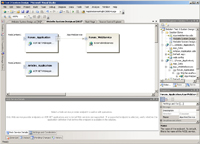
- At this point the solution will be created and you will see the system diagram
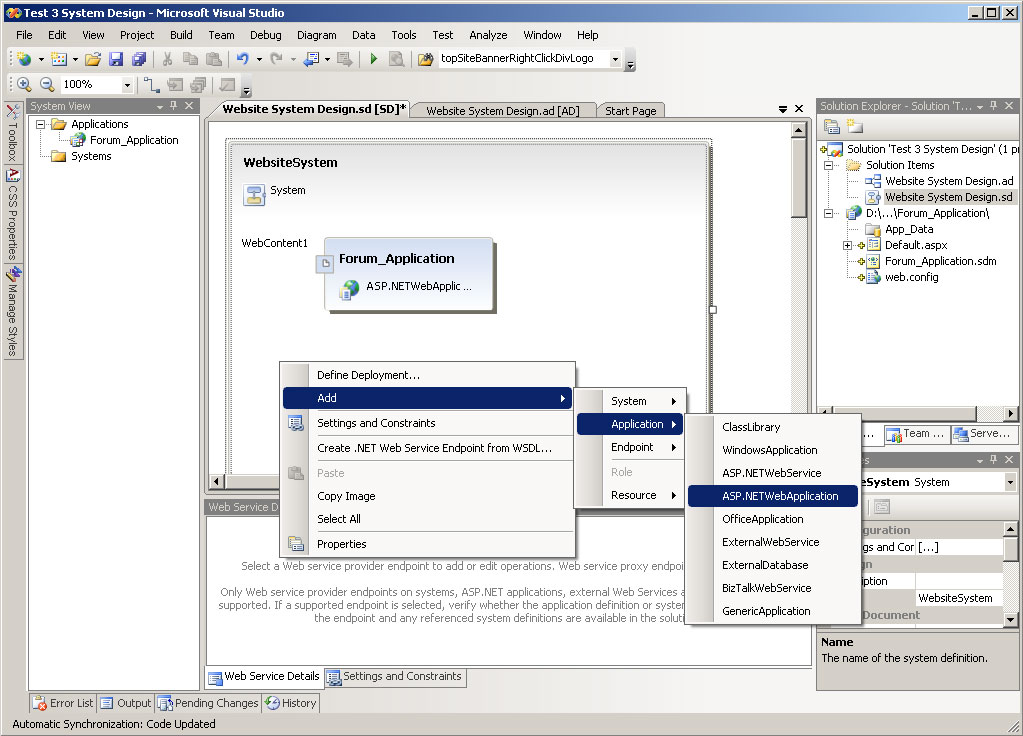
- To help keep things visually separate, I renamed the system title from "Test 3 System Design" to "WebsiteSystem"
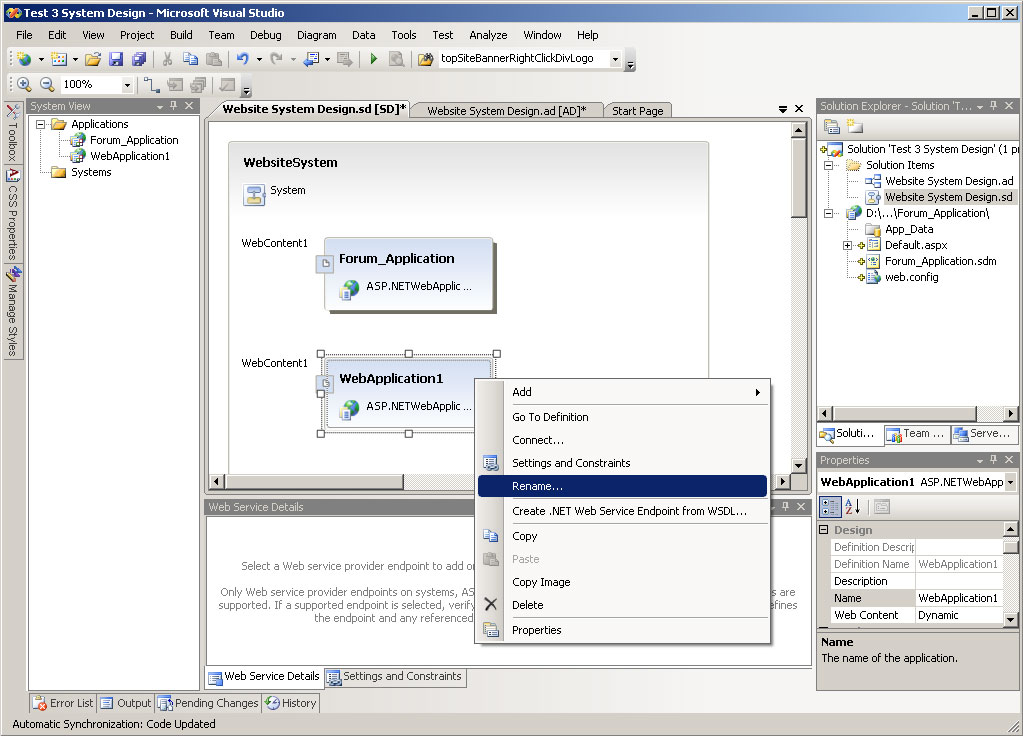
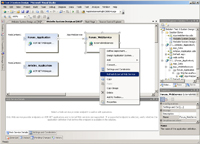
- To add the forum web application, right click on the system diagram
- Click on "Add" from the popup menu
- Click on "Application" from the popup menu
- Click on "ASP.NETWebApplication" from the popup menu
|
|
STEP 9
|
(Enlarge)
|
- Right-click on the box that appears
- Click on "Rename..." from the popup menu
|
|
STEP 10
|
(Enlarge)
|
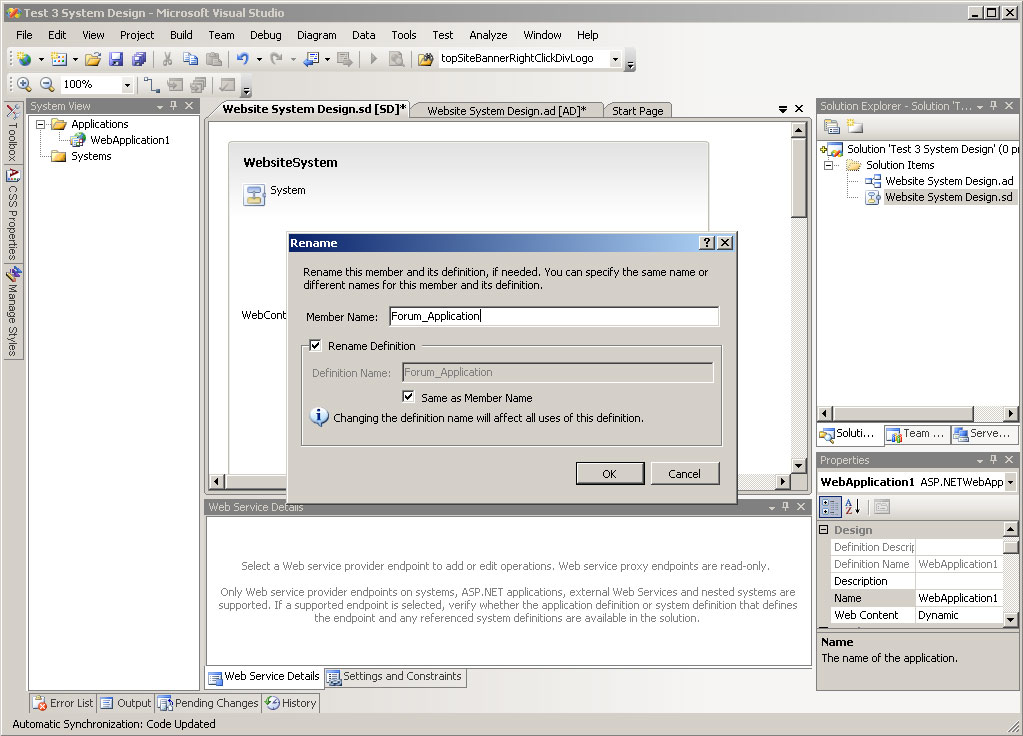
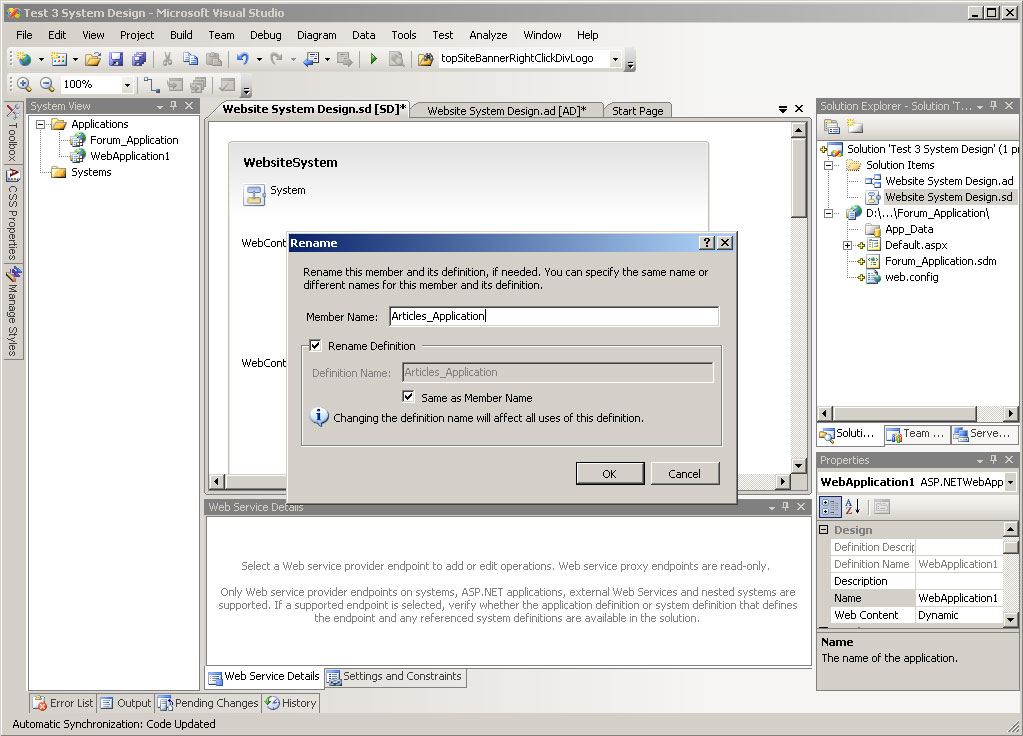
- Rename the member something intuitive
|
|
STEP 11
|
(Enlarge)
|
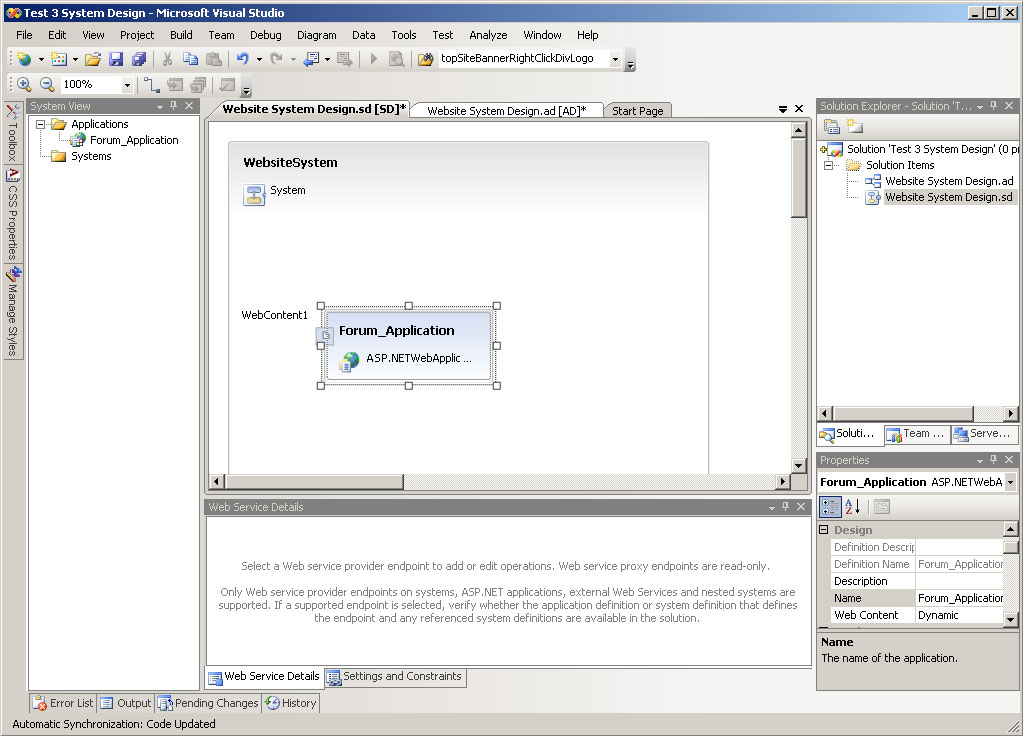
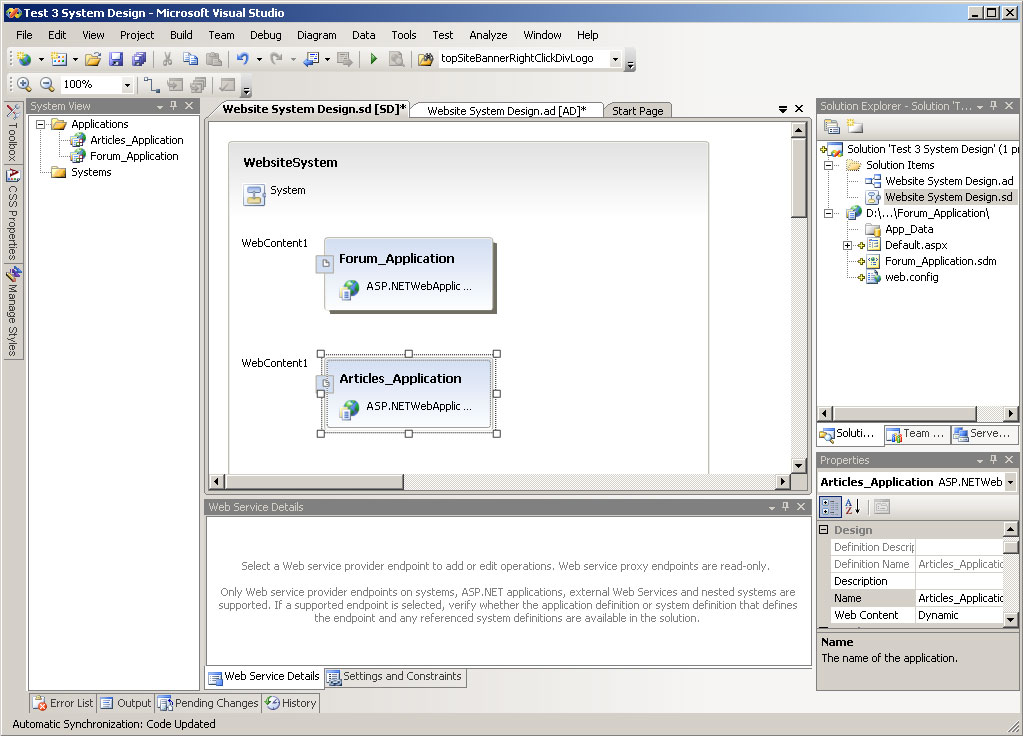
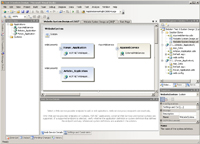
- The member is renamed
- Notice the rename is reflected under "Applications" of the system view
|
|
STEP 12
|
(Enlarge)
|
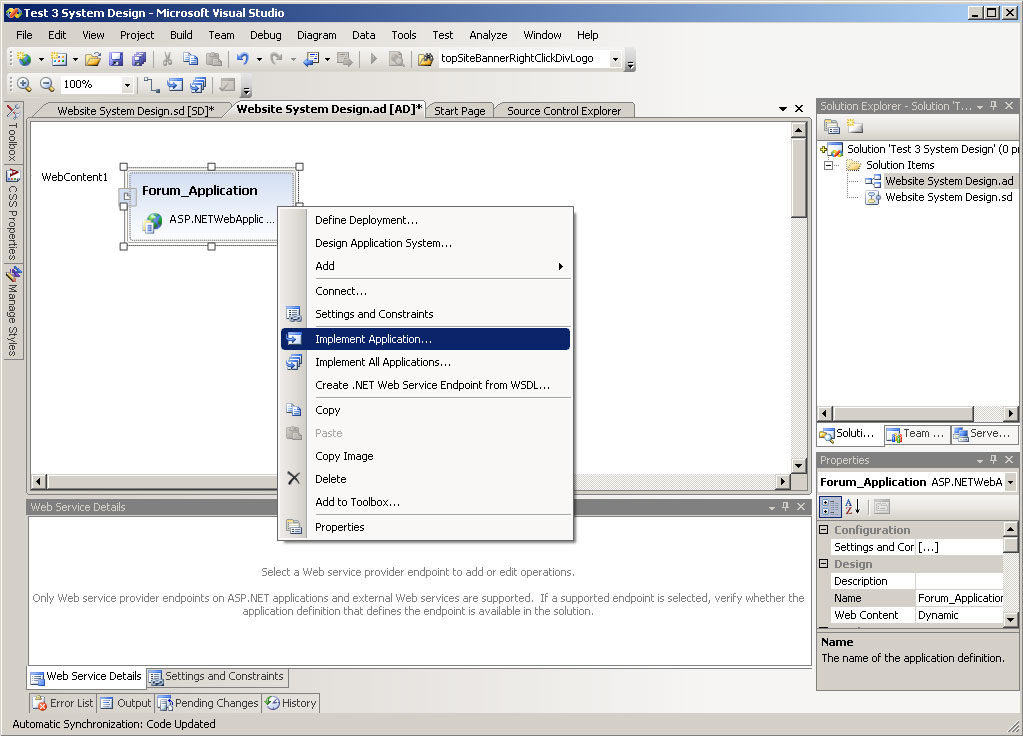
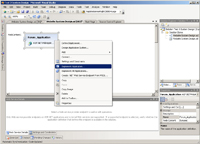
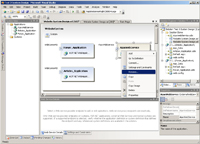
- Under the application design, right-click on the member
- In the popup menu select "Implement Application..."; you do not need to necessarily do this step now, but I do
|
|
STEP 13
|
(Enlarge)
|
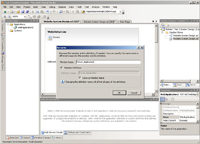
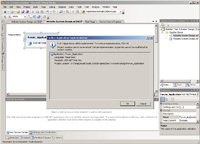
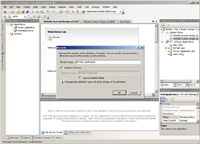
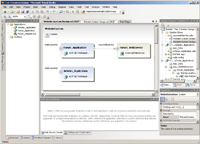
- You will see a confirmation stating some properties will become read-only basically (I've not yet experienced a scenario where this would be a problem)
- Click on the "OK" button for implementation to occur
|
|
STEP 14
|

(Enlarge)
|
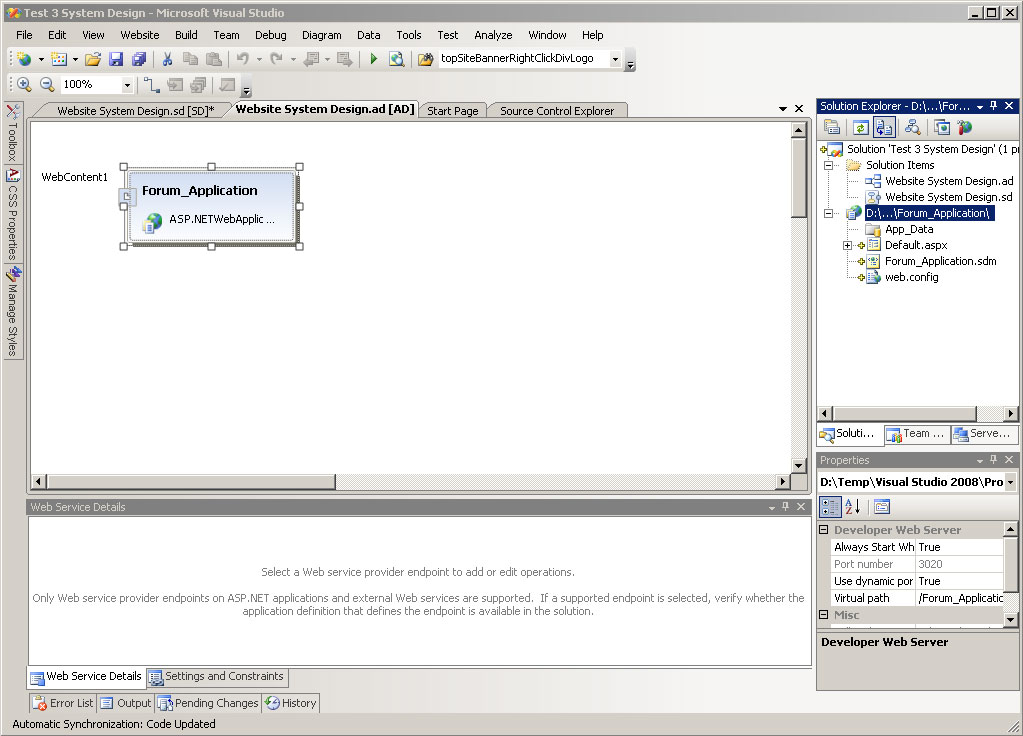
- Upon examination of the solution explorer, you will see that Visual Studio has automatically create the initial structure and base code (such as default.aspx) for you
- If you are more knowledgeable with .Net and building applications, you may want to add other .aspx pages at this time as needed
|
|
STEP 15
|

(Enlarge)
|
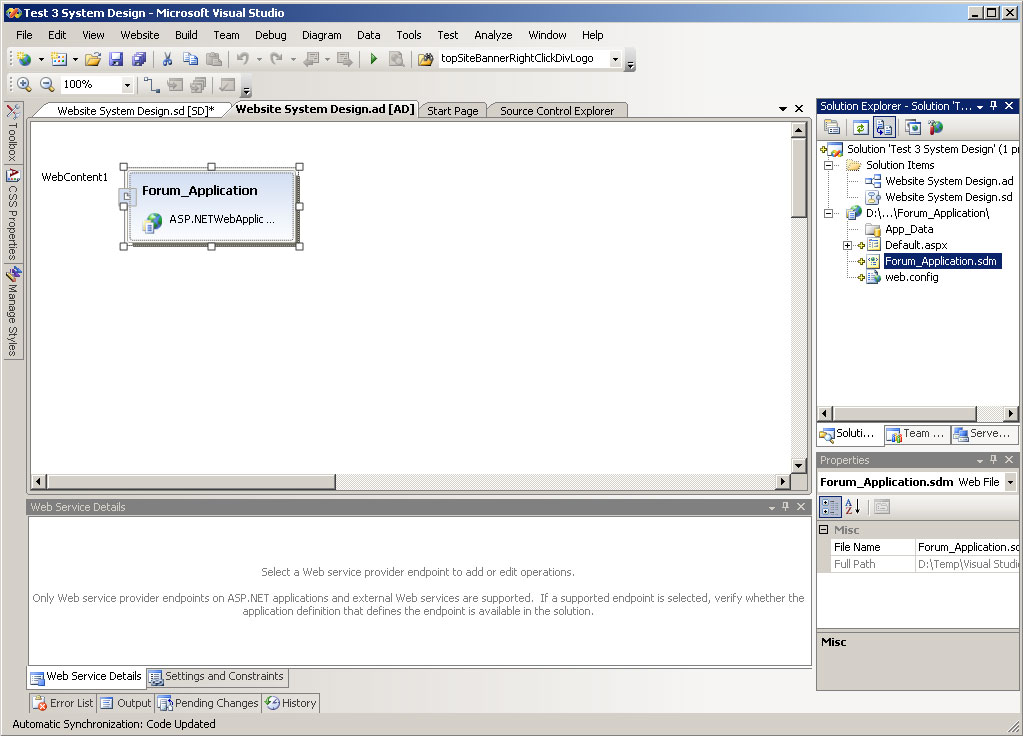
- As you can see, an SDM is created for you as well
|
|
STEP 16
|
(Enlarge)
|
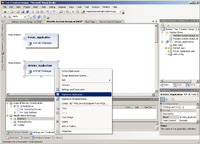
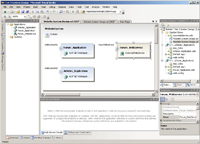
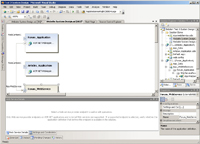
- After switching back to the system diagram, right-click on it to bring up the popup menu so the second web application (articles) can be added
- From the popup menu select "Add"
- From the popup menu select "Application"
- From the popup menu select "ASP.NETWebApplication"
|
|
STEP 17
|

(Enlarge)
|
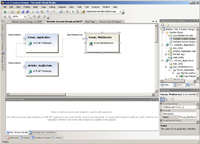
- The web application is created with it's default title, which will be changed shortly
|
|
STEP 18
|

(Enlarge)
|
- Right-click on the box
- From the popup menu select "Rename..."
|
|
STEP 19
|
(Enlarge)
|
- In "Member Name:" enter the new name for the web application
- Click the "OK" button
|
|
STEP 20
|

(Enlarge)
|
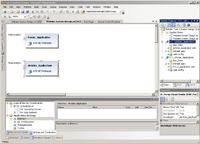
- You will notice that the web application has been renamed
|
|
STEP 21
|
(Enlarge)
|
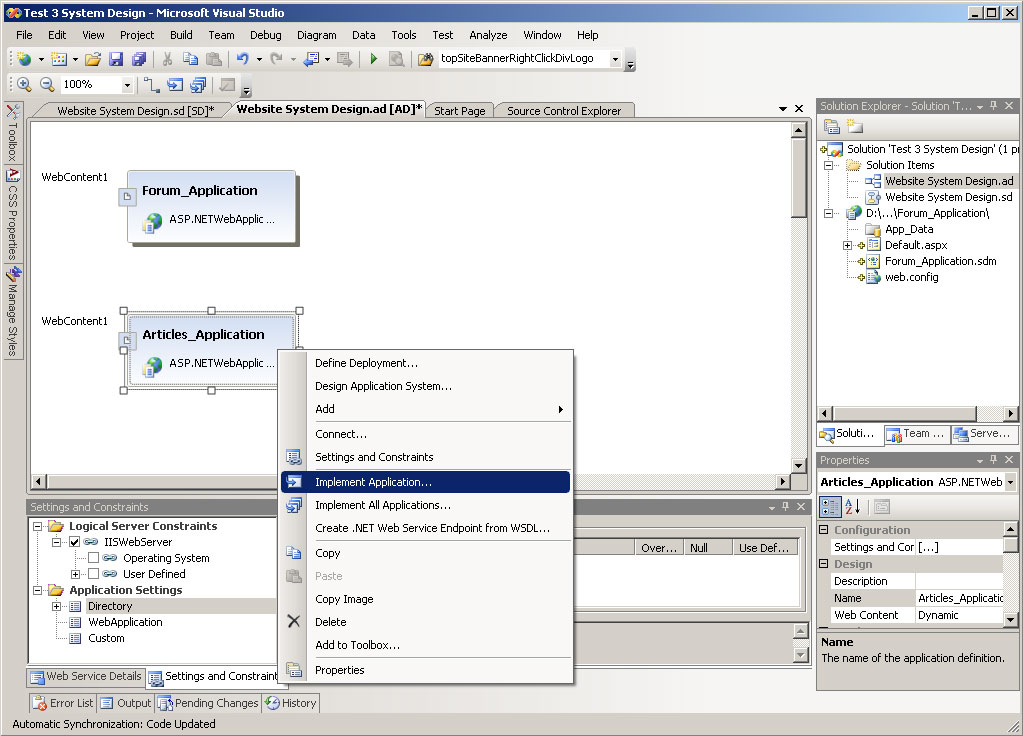
- Under the application design tab, right-click on the web application box
- From the popup menu select "Implement Application..."
|
|
STEP 22
|

(Enlarge)
|
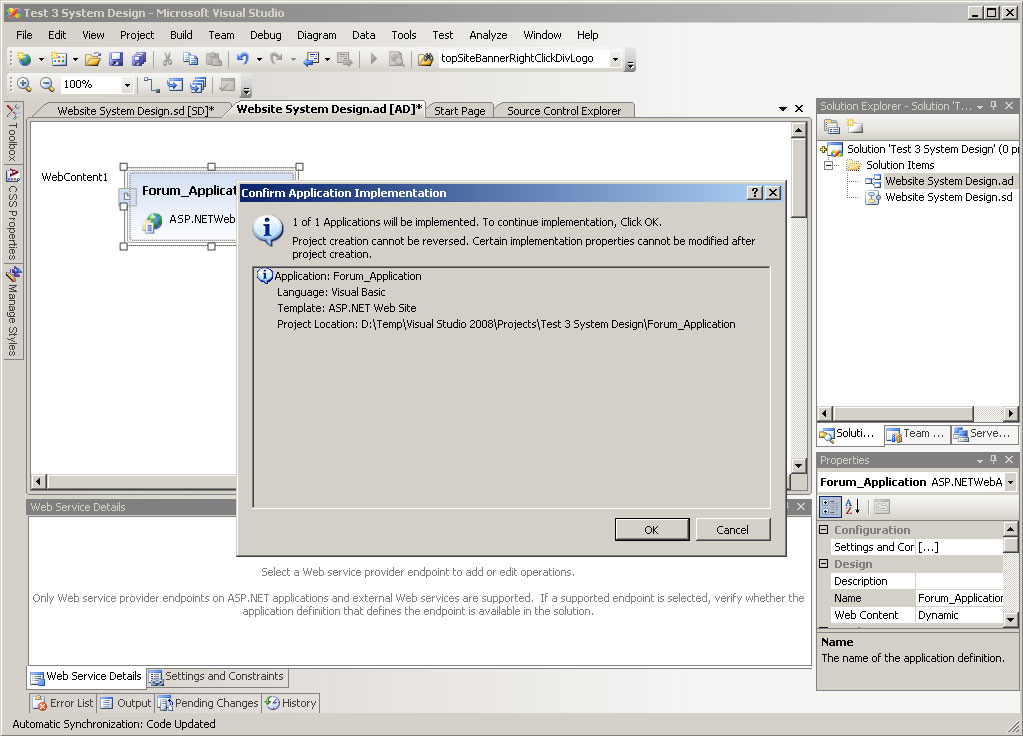
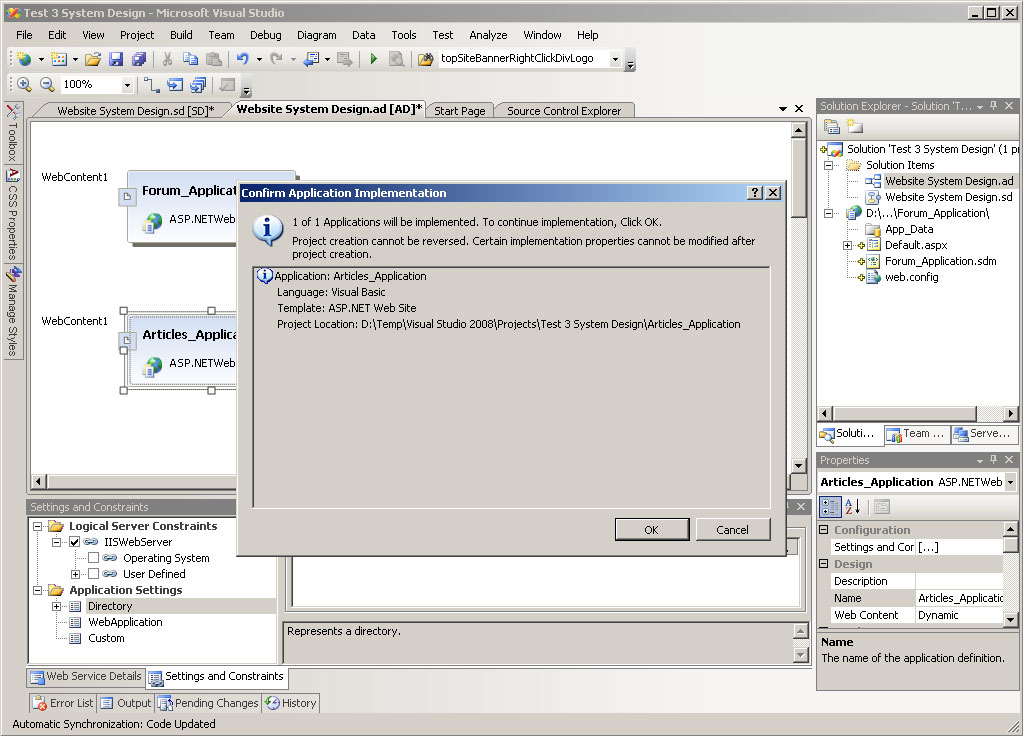
- As you had seen before (with the forum application), you will need to confirm that you want to complete the implementation process
|
|
STEP 23
|
(Enlarge)
|
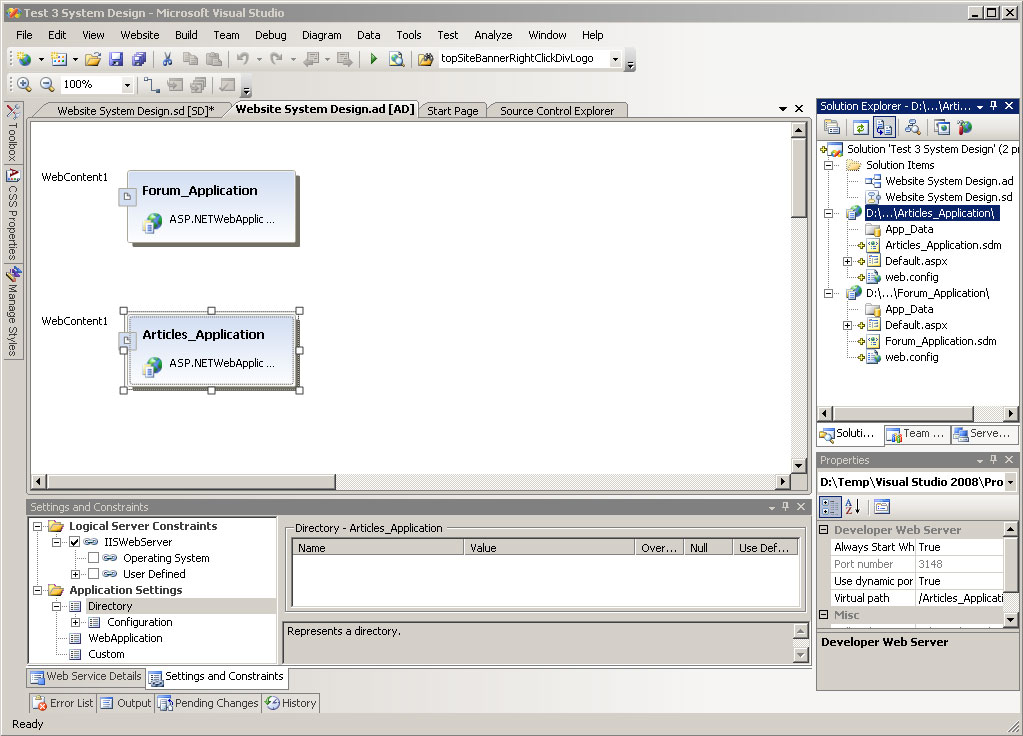
- Upon examination of the solution explorer, you will see that Visual Studio has automatically created the initial structure and base code (such as default.aspx) for you
- If you are more knowledgeable with .Net and building applications, you may want to add other .aspx pages at this time as needed
|
|
STEP 24
|
(Enlarge)
|
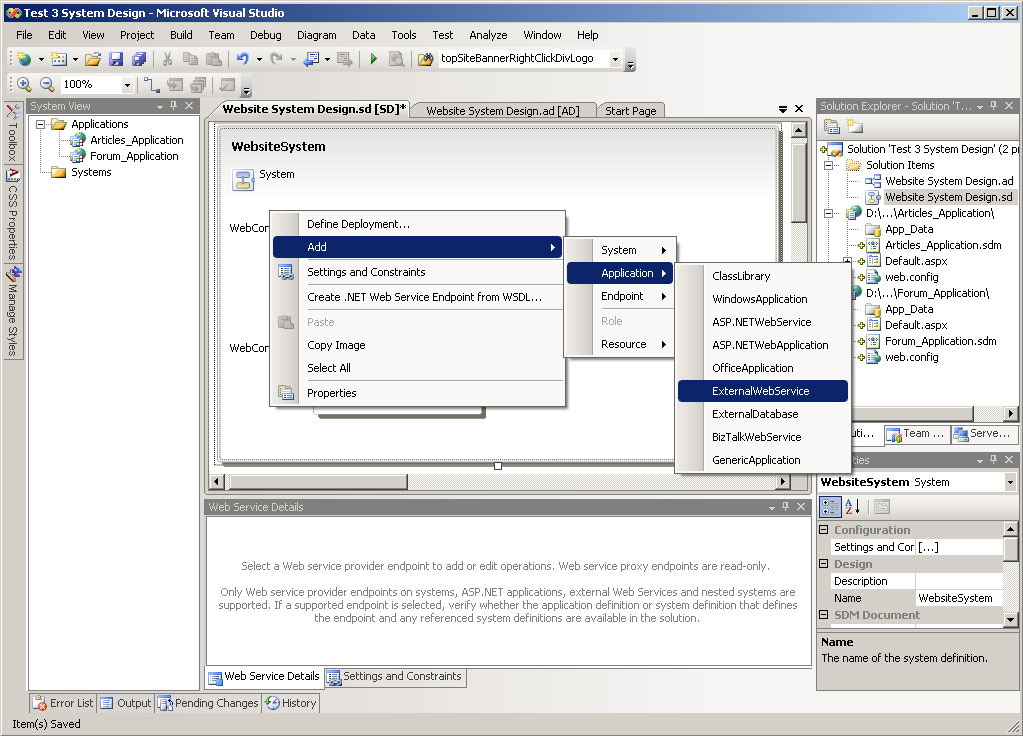
- Now we'll focus on adding the external web service to the forum web application
- Under the system design tab, right-click in the area
- From the popup menu select "Add"
- From the popup menu select "Application"
- From the popup menu select "ExternalWebService"
|
|
STEP 25
|

(Enlarge)
|
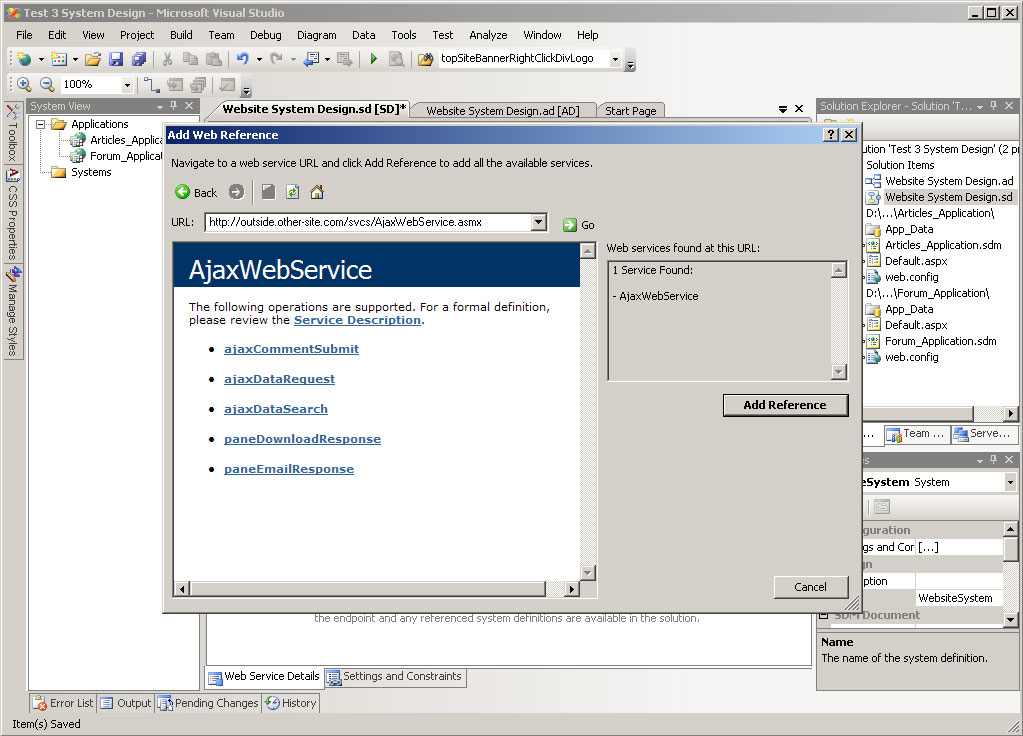
- You will see the "Add Web Reference" window
- In the URL area, provide the full path to the web service
- If the web service is recognized, a list of web service calls will become visible
- If you are satisfied, click on the button labeled "Add Reference"
|
|
STEP 26
|
(Enlarge)
|
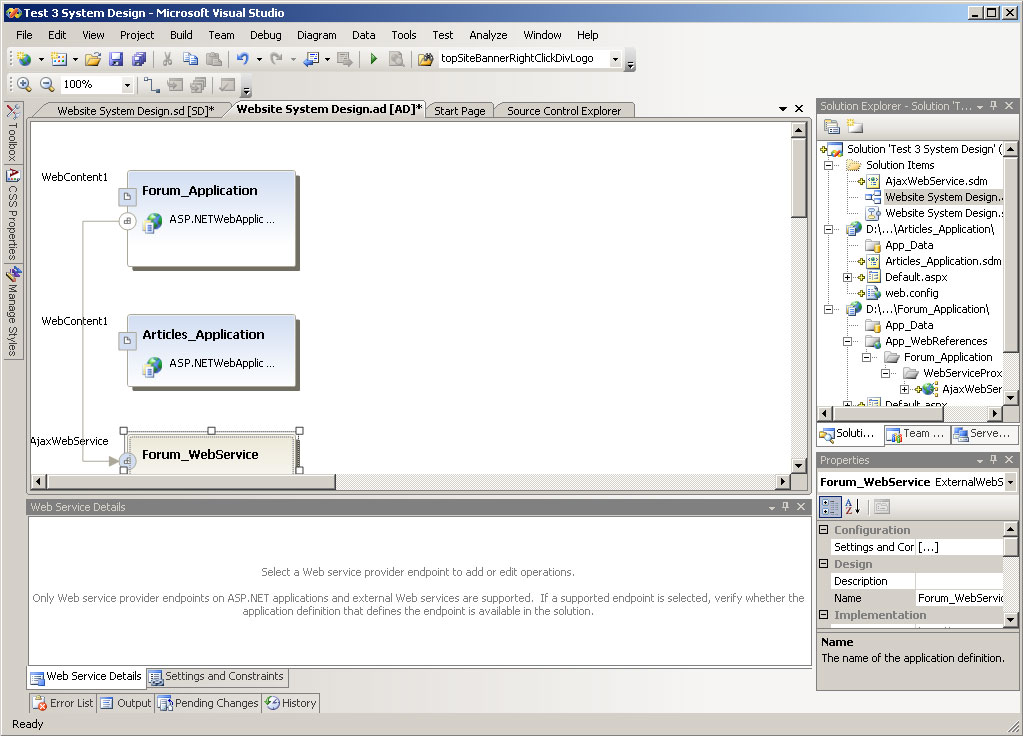
- The external web service box should now be added
- We will want to rename it (so from the solution view window, for instance, we can easily see it as an entity that belongs to something else)
|
|
STEP 27
|
(Enlarge)
|
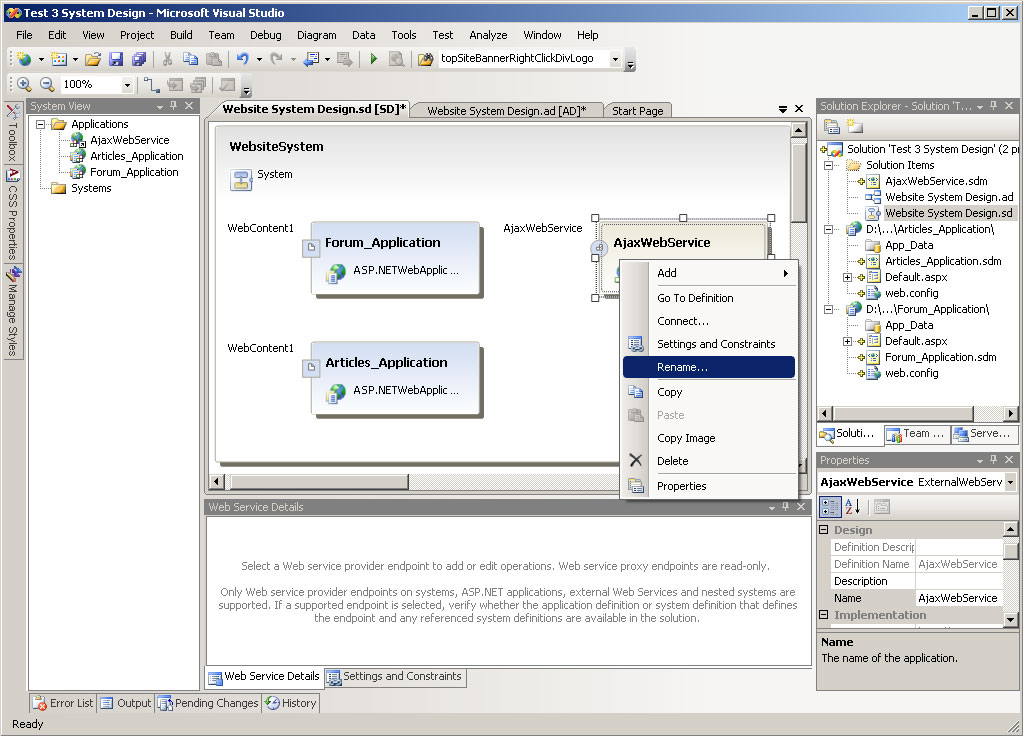
- Right-click on the external web service box
- From the popup menu select "Rename..."
|
|
STEP 28
|
(Enlarge)
|
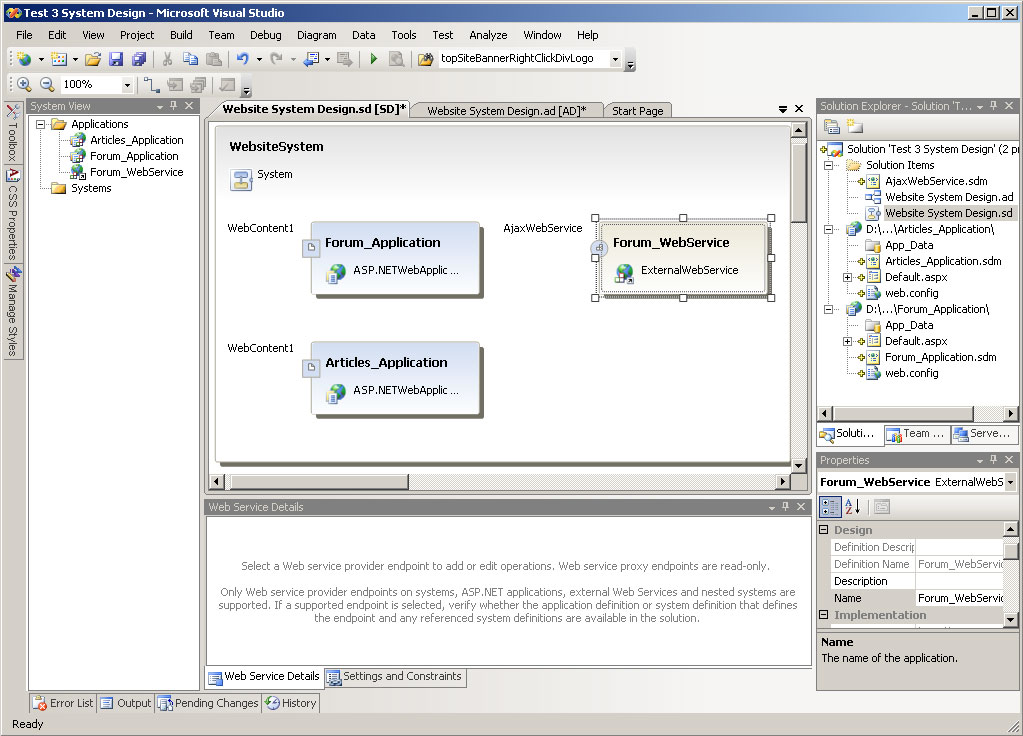
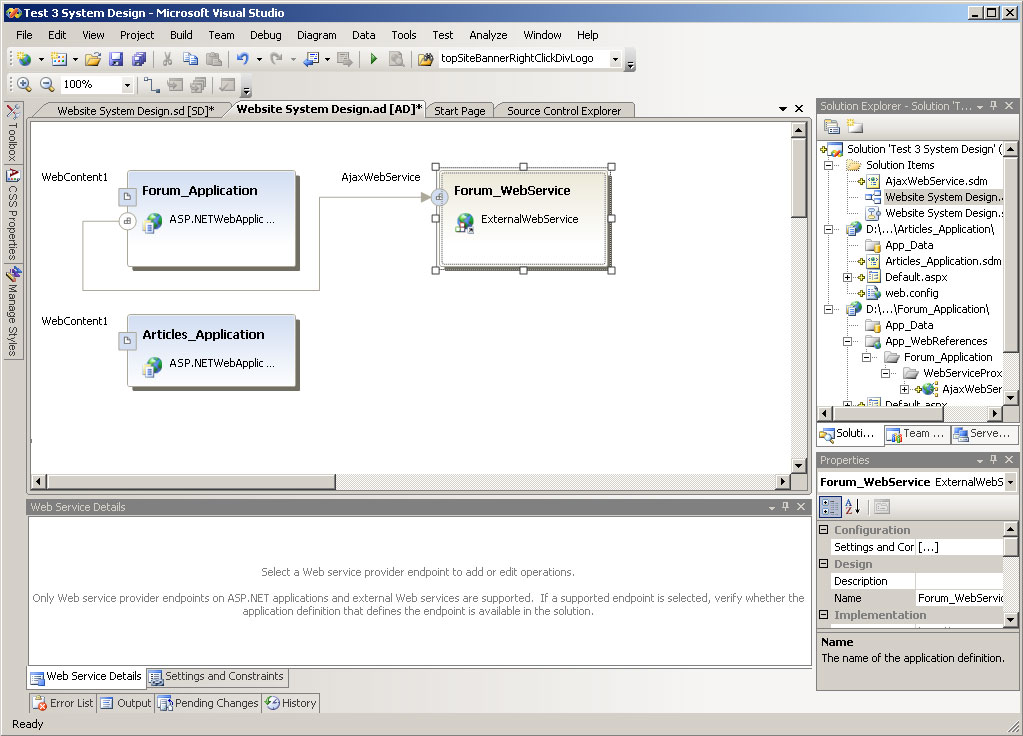
- Rename the external web service
- In this case, it was renamed to "Forum_WebService" to indicate that it was a web service, but also it could be assumed to be related to the forum application
|
|
STEP 29
|
(Enlarge)
|
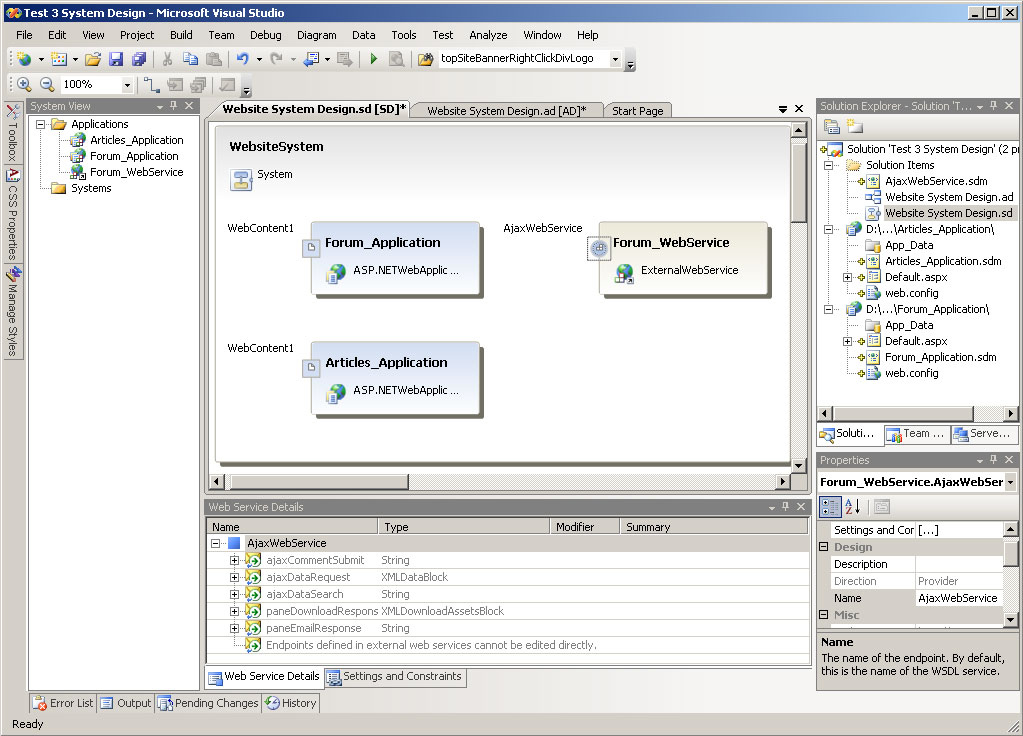
- We can do a "quick view" of what Visual Studio recognized from the web service by clicking on that little circle you see on the left side of the external web service box
- Below, in the "Web Service Details" box a list of expandable web service calls will be exposed
|
|
STEP 30
|
(Enlarge)
|
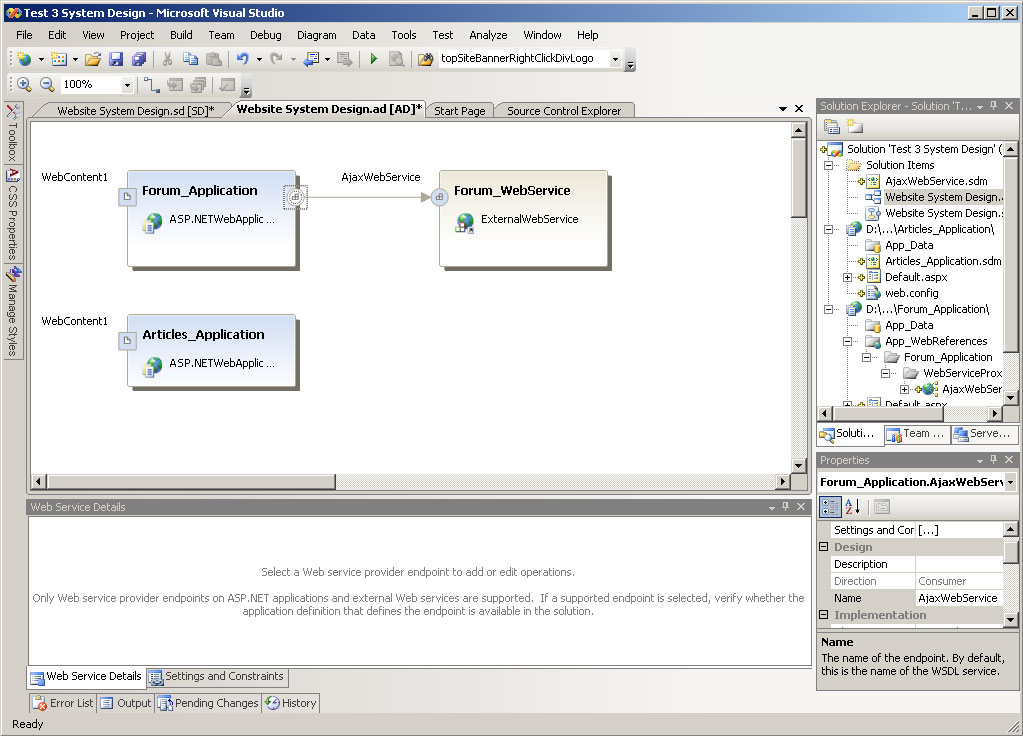
- It is a very simple process to connect the external web service to the forum application (a connection needs to be made so that the forum application can interact with the external web service)
- To make the connection, click and hold on the circle and drag it to the forum application box and then release
- Notice (from looking at the solution explorer), Visual Studio will automatically setup the web service primitives into the forum application for you automatically; this includes generation of the .disco and .wsdl files
- Is that painless or what?
|
|
STEP 31
|
(Enlarge)
|
- Now it's time to clean up and organize the application design window (you can see that it is a bit jumbled up)
|
|
STEP 32
|
(Enlarge)
|
- Reorganize the content as you see fit
|
|
STEP 33
|
(Enlarge)
|
- If you would like to re-orient the path of lines you can actually grab and drag individual lines forming a connection or you can left-click and hold over the forum application connection and drag it around the forum application box
|
|
STEP 34
|
(Enlarge)
|
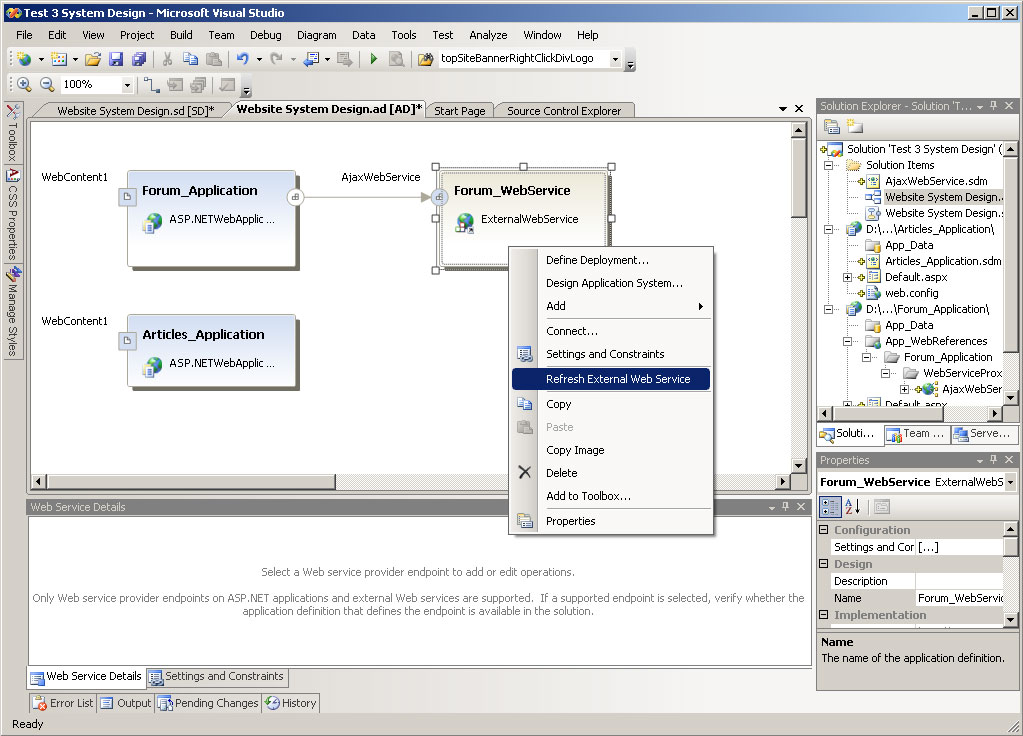
- Need to make sure you've got the most up-to-date data pertaining to that external web service? You can right-click on the external web service box here and from the popup menu select "Refresh External Web Service"
- Is that painless or what?
|