The gatekeeper of reality is
quantified imagination.
quantified imagination.
Project Pi2
|
The Raspberry Pi 2's board uses a MicroSD card; for this project I used a class 10 64GB card (as well as a dedicated 64GB card plugged into one of the USB 2 slots). Something else that should be noted is that USB 3 cannot be plugged into a USB 2 slot and be usable (unlike Windows). If you want to use a USB hub with the Raspberry Pi 2 (as of 9/2015) you may want to consider a USB 2 hub.
The first thing that was done with the Raspberry Pi 2 was to get a default Raspberry Pi 2 image onto the MicroSD card: This pre-made image worked: https://wiki.ubuntu.com/ARM/RaspberryPi After downloading that image onto your computer (I'm assuming Windows), an application called Win32 Disk Imager will take that image and place it on the MicroSD card. If that fails for some reason, there are several others available under Windows such as Pen Drive. After the image has been placed on the MicroSD card you should be able to place the MircoSD card into the Raspberry Pi 2 (as well, you may want to also plug in a USB 2 hub, keyboard, mouse, HDMI monitor, external USB drive (for additional storage) and either Ethernet or the Raspberry Pi Wireless device. Then turn it on! Your login will be ubuntu / ubuntu by default. |
|
|
Using Wireless:
If you are using wireless instead of the Ethernet cable, there's some work that you will need to do in order for you to connect to the Internet as indicated by this website: sudo apt-get install wireless-tools wpasupplicant Some other helpful commands for working with wireless and configuring it): sudo nano /etc/network/interfaces (pointer to the wireless configuration) sudo nano /etc/wpa_supplicant.conf (configuration of the wireless) When the wireless access point changes will need to run (if ! is in password preceed it by \): wpa_passphrase YOURSSID YOURWIFIPASSWORD sudo nano /etc/init.d/wpa.sh (Wireless startup script) sudo chmod +x /etc/init.d/wpa.sh (Will make the startup script executable) sudo update-rc.d wpa.sh defaults (Wireless script integrated into start-up and shut-down of OS) sudo iwlist scan | less (Look for wireless access points) iwconfig (Let's you see if your wireless is configured or not) sudo ifconfig wlan0 up (If not using wpa.sh file to start wireless you can try this) When wpa.sh is configured (will be unique to your wireless access point) the following will allow you to work with it: /etc/init.d/wpa.sh debug /etc/init.d/wpa.sh start /etc/init.d/wpa.sh stop |
|
|
Resize the OS MicroSD card:
In order to resize the MicroSD card which holds the OS, this website gives a good example of expanding the drive so you can use all the space instead of just the tiny amount available from the OS image itself. |
|
|
Setup the external MicroSD / USB card:
Assuming that you want to have a "permanent" USB storage option (by using one of the USB slots), you can get that USB card setup such as: fdisk -l (to identify the card since it is not mounted; it should report itself as something such as "/dev/sda") sudo mkfs.vfat -I /dev/sda (where /dev/sda is its identifier - it may be different in your case) Then, to mount the USB card as "permanent" storage: nano -w /etc/fstab /dev/sda /media/externalusb vfat user,fmask=0111,dmask=0000 0 0 Now, each time the Raspberry Pi 2 is booted up, the extra space via the USB card should be available for use. If you want to unmount the USB card at some point you could enter: sudo umount /dev/sda Do you want to be able to plug in other USB cards into the Raspberry Pi 2 and have them get recognized and mounted so they are ready for you to access? You may want to try: sudo apt-get install exfat-fuse exfat-utils |
|
|
Create Swap Space (more RAM!):
This website has a great step-by-step of making swap space (in the case of this project a simple file was used). The only thing that was done, after creating the swap space was changing swappiness. With the image that is being used on the Raspberry Pi 2 there is only one place the swappiness is changed (dictates how much physical RAM versus virtual RAM is used). That is done by: sudo nano /proc/sys/vm/swappiness Once the file is open the only value that should be present is 60 (the default value). Change that to 10 and save it. |
|
|
Get Audio to Work:
If you want to use the Plugable USB for Audio (which has audio and microphone) you will need to do the following as indicated by this website: sudo apt-get install alsa-utils sudo nano /usr/share/alsa/alsa.conf Change defaults.ctl.card 0; to defaults.ctl.card 1; Change defaults.pcm.card 0; to defaults.pcm.card 1; speaker-test -t sine -f 440 -c 2 -s 1 (perform tone sound test) aplay /usr/share/sounds/alsa/Front_Center.wav alsamixer (we are going to turn on the microphone - so you may want to have it plugged in) Press F4 Press Spacebar (to enable capturing) Exit application arecord -d 5 test-mic.wav (after entering this command talk into the microphone) aplay test-mic.wav (listen to yourself talk) Optional: add an MP3 player via - apt-get install mpg123 |
|
|
Change password of the "ubuntu" account:
Since everyone on the internet will know that the ubuntu user account has a password that is the same as the name, you may want to change the password as indicated below: passwd ubuntu Changing the username and real name of a user account can get hairy (so you may want to read up on this before attempting to change the username or real name of an account): sudo su usermod -l newname ubuntu usermod -c "New Real Name" ubuntu (will be "ubuntu" or whatever username the account currently is) |
|
|
Install a repository remover (apt-get, already installed can remove some repositories).
sudo apt-get install ppa-purge At this point you may want to power off and make a backup clone of the MicroSD card with the OS on it such as: sudo poweroff If you don't already have xterm (should be in /usr/bin) then you will want to get it: sudo apt-get install xterm |
|
 |
Install aptitude which will help get Ubuntu Mate installed where apt-get fails (there are a lot of webpages out there with tips on installing Ubuntu Mate from the developers and others but none seem to take into account someone installing from the Raspberry Pi 2):
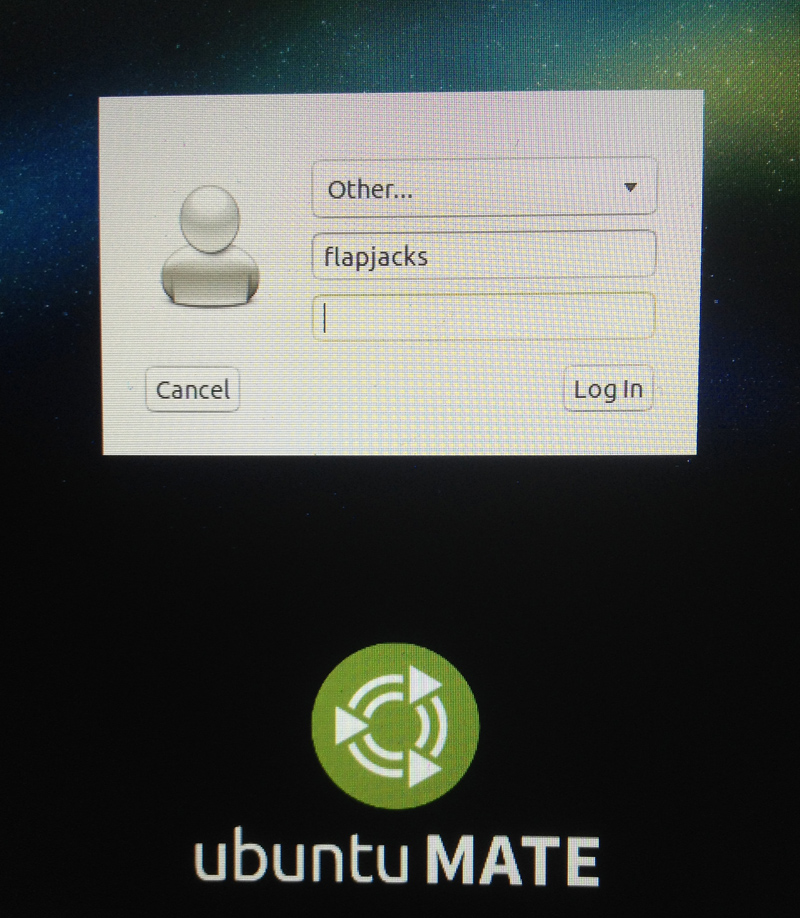
sudo apt-add-repository ppa:ubuntu-mate-dev/ppa sudo apt-add-repository ppa:ubuntu-mate-dev/trusty-mate sudo apt-get update (gets lists that have updated) sudo apt-get upgrade (this actually performs the updates based on what update found) sudo apt-get install aptitude sudo aptitude install mate-desktop-environment-extras (as I recall there were a few issues with this so may not work for you) sudo aptitude install ubuntu-mate-core sudo aptitude install dbus-x11 sudo reboot After reboot, the Ubuntu Mate desktop should appear! |
|
If you want desktop shortcuts (like what you have on Windows):
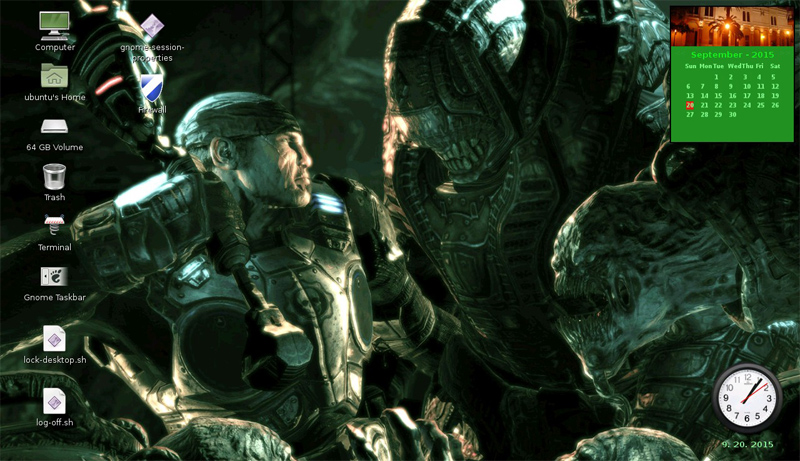
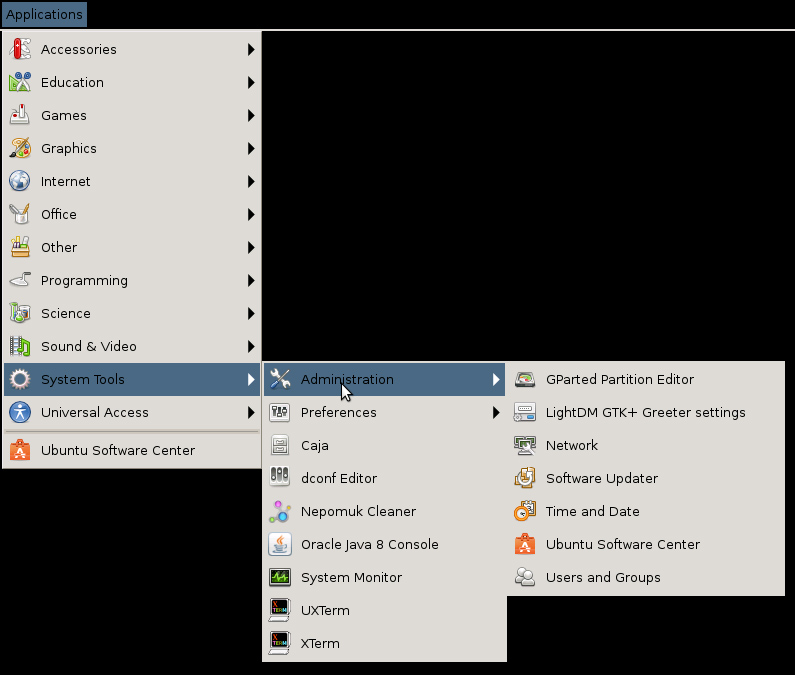
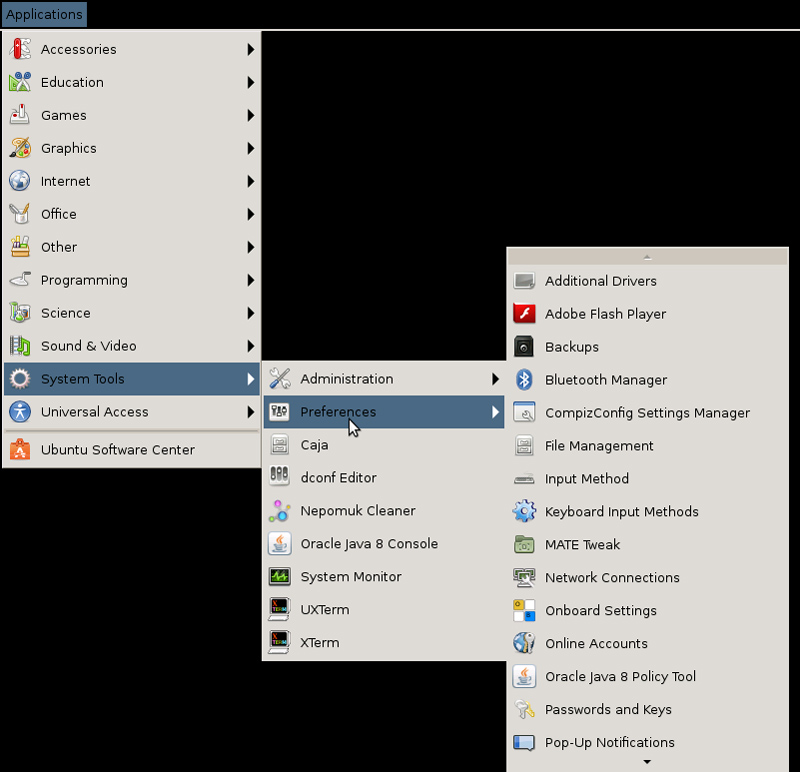
Open computer and under file system go to: /usr/bin. Locate xterm and double-click on it (to bring up terminal). sudo apt-get install --no-install-recommends gnome-panel Then, from the terminal window enter): gnome-desktop-item-edit --create-new ~/Desktop With the desktop icon window up, to make a short-cut to the terminal then: Go to /usr/bin and select xterm then enter a title for the terminal shortcut. You can do the same for the gnome panel (so you don't have to memorize a keyboard combination): gnome-desktop-item-edit --create-new ~/Desktop Go to /usr/lib and select gnome-panel (this is to enable the task bars that are hidden by default) A simple firewall should also be available to you. If you want to create a desktop shortcut then you will need to create one for: /usr/bin/gufw NOTE: Each time you log in you should start the firewall (which runs as superuser). This simple firewall has issues with being added into the list of startup applications and actually starting...but if you have it as a desktop shortcut and you manually start it then it should be fine. If you want to share files on the local network (however, under Computer should be a section for Network already present so you may not need the following): sudo apt-get install samba system-config-samba cifs-utils winbind You may want to get zip and unzip utilities: sudo apt-get install p7zip-full sudo apt-get install p7zip-rar If you want to have the time and calendar show up on the desktop like what is shown by the screenshot: sudo apt-get install gdesklets After you have activated the gnome-panel (and clicking top left of window) then: Applications -> Accessories -> gDesklets. From here you can double-click what you want to have visible on the desktop (and right-click those to configure them). To preserve the settings between system start-ups then you will need to open Applications -> System Tools -> Preferences and click on Startup Applications. Under Startup Programs click "Add" and for the name enter "Gdesklets" and for command enter "/usr/bin/gesklets". Click the Add button. Some miscellaneous applications that you may want to install: sudo apt-get install libgtk-3-dev sudo apt-get update sudo apt-get install oracle-java7-jdk NOTE: While on the subject of Java, there is Java that will not run on ARMHF (Raspberry Pi 2), while other Java will - this also complicates finding supposidly Java applications that "run everywhere". If you end up needing a version of Java with a JRE that is built for ARMHF then you may want to consider getting: Linux ARM v6/v7 Hard Float ABI - jdk-8u60-linux-arm32-vfp-hflt.tar.gz sudo apt-get install xpdf (this allows you to open and read PDF files) |
|
A few other things you may wish to install (via the terminal):
sudo add-apt-repository universe sudo apt-get install gparted Chromium web browser (Firefox should already be installed): sudo apt-get install chromium-browser sudo apt-get install freeglut3-dev sudo apt-get install libsdl1.2-dev libsdl-image1.2-dev libsdl-mixer1.2-dev libsdl-ttf2.0-dev |
|
|
Screensaver:
It would be handy to be able to have a screensaver in place so it would come up when you lock the computer via (Control + Alt + L): sudo apt-get install xscreensaver sudo apt-get install xscreensaver xscreensaver-data-extra sudo apt-get install xscreensaver xscreensaver-gl-extra sudo apt-get remove gnome-screensaver -y xscreensaver-demo In desktop go to Applications -> System Tools -> Preferences -> Startup Applications and click on "Add". Enter a name for the screen saver and enter "xscreensaver -nosplash" for the command. Restart the system. You can also lock the desktop via a small script located in your desktop (marked as executable). Here is the code: #!/bin/bash xscreensaver command -lock You could also have a file on your desktop for logging yourself out (which would return you to the main Ubuntu Mate login screen) and marked as executable. Here is the code: #!/bin/bash kill -9 -1 |
|
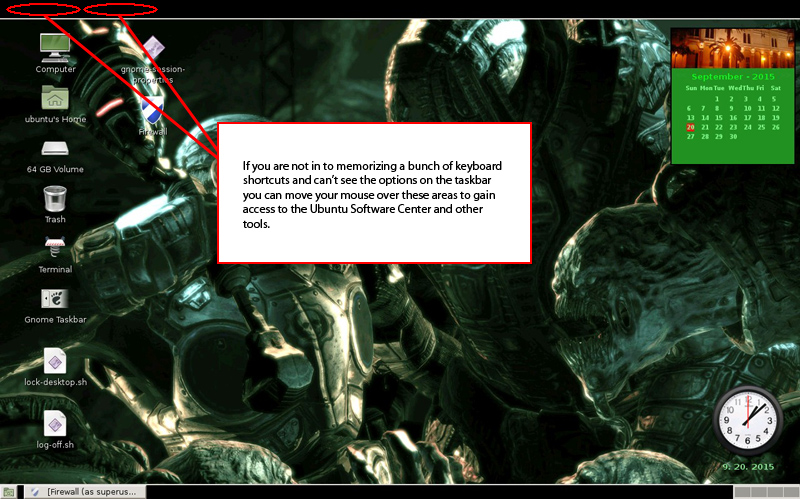 |
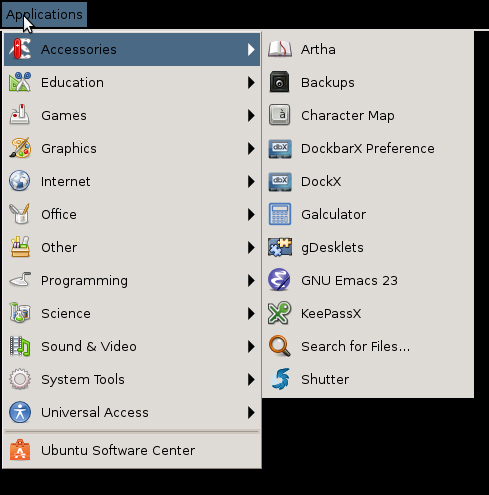
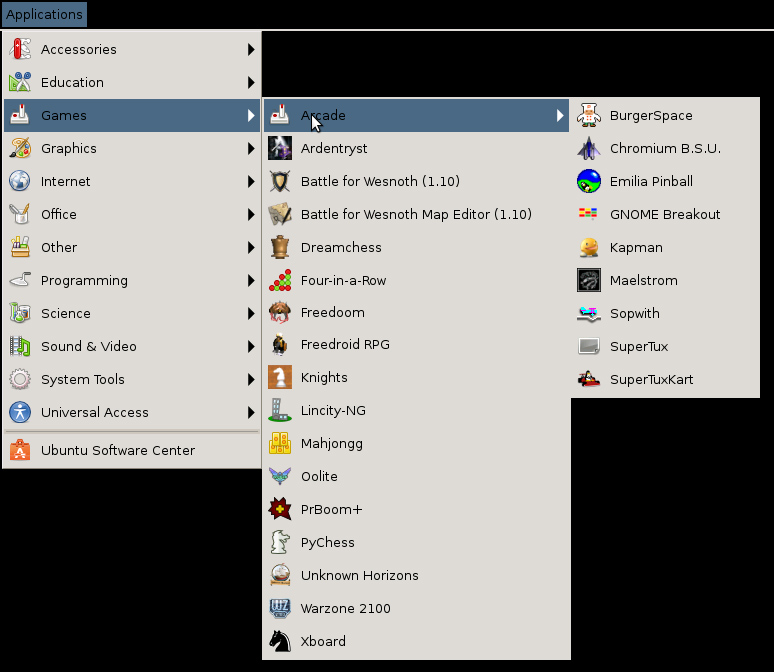
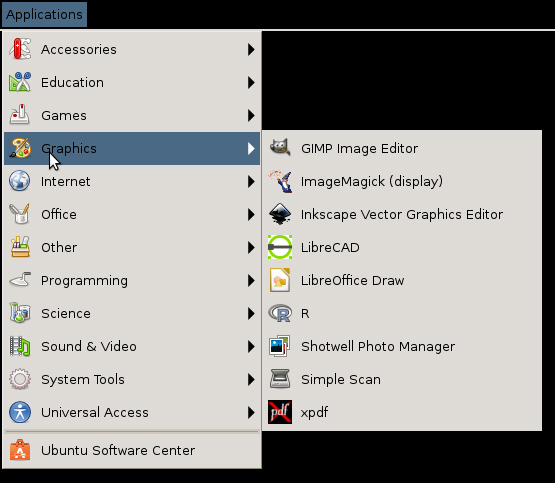
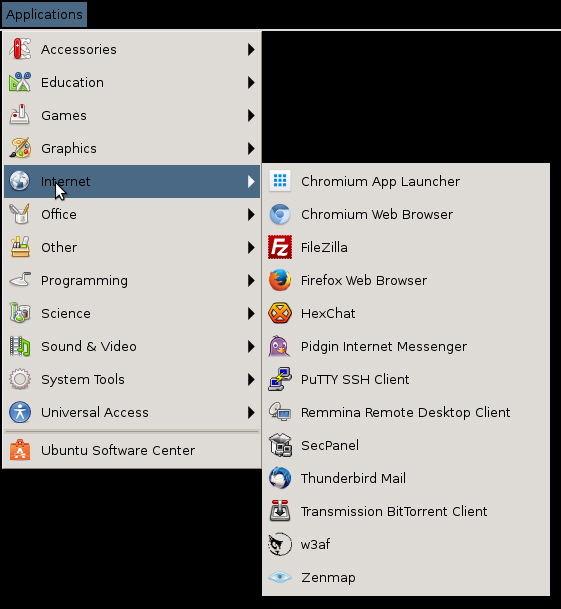
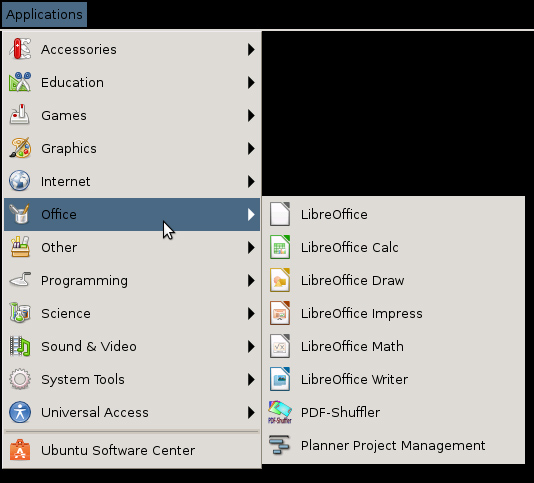
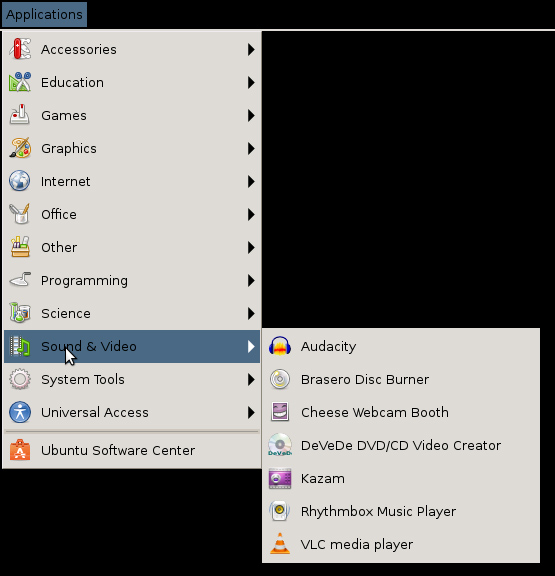
At this point most other software that you may wish to install may be done from the Ubuntu Software Center. If you did some reading up on Ubuntu Mate it has some software pre-installed (like LibreOffice)...but how do you get to those applications and the Ubuntu Software Center from the desktop? If you recall, we made a shortcut to the gnome panel earlier. If you double-click that shortcut then a panel should show up at the top and bottom of the desktop (I tend to refer to as a "taskbar"); see the screenshot. In the top panel there will be a few tabs you can click on that will expose additional menus for you...among them being the Ubuntu Software Center.
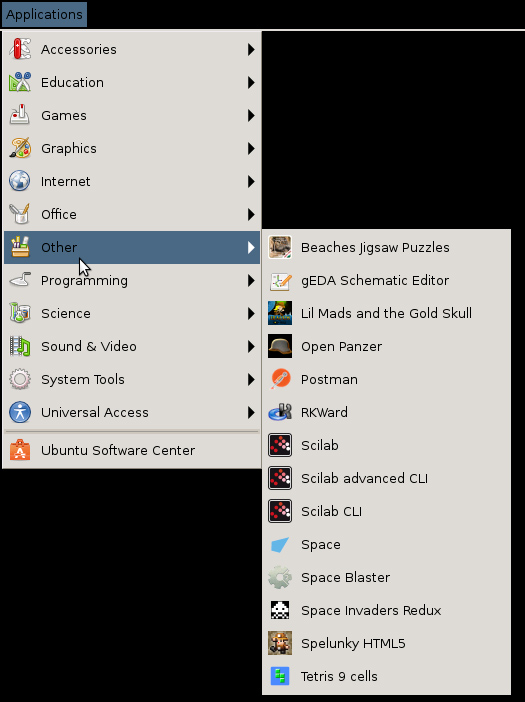
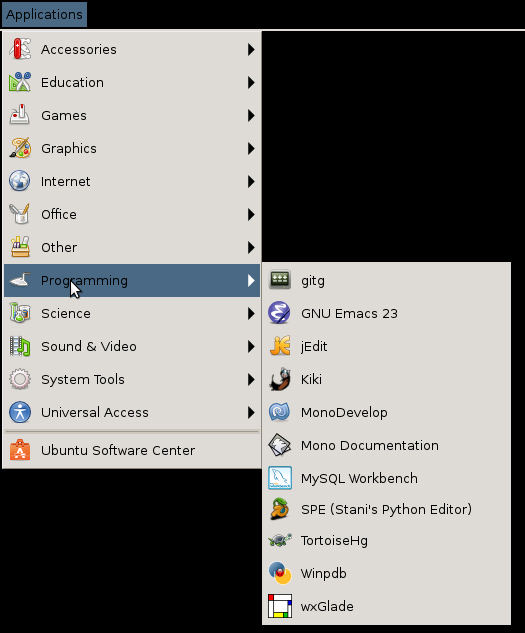
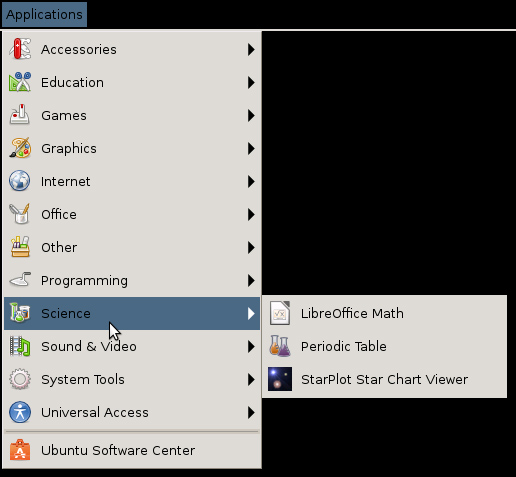
Software applications that should be installed via Ubuntu Software Center include mySQL Workbench (assorted online webpages instructions, including that from Oracle, will fail), Project Management Planner, KeepassX, Putty, Filezilla, Gimp, Inkscape. Blender, although available through the Ubuntu Software Center, will not run correctly. Below are a collection of screenshots of various applications that do run on the Raspberry Pi 2 with Ubuntu Mate since there are quite a few. 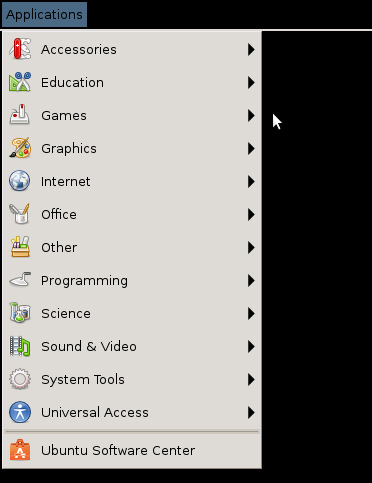
|
|
The following are handy bits of information that may be useful when working with Linux:
Safely power off: sudo poweroff Determine if a package is installed: dpkg -l package_name Renames a file but can also be used to move a file: mv /home/docs/files/resumezzz.pdf /home/docs/files/resume.pdf Change ownership of a folder (could also be a file): chown newownerusername /folder Change ownership of a folder and all its sub-folders and files: chown -R newownerusername /folder Change ownershiop of a folder and set the group to httpd: chown root:httpd /folder Removes a folder and all its content: rm -rf /folder Find a file by its name: find / -iname name-of-file Install a deb package that was downloaded onto computer: sudo dpkg -i [packagename.deb] Locate missing required dependencies: sudo apt-get install -f Remove an official installed package: sudo apt-get remove package-to-uninstall Remove an PPA installed package: sudo ppa-purge ppa_name If you have putty installed and you work with Amazon AWS, you will need to create a ppk from the pem file that AWS provides (useful for being able to SSH into a EC2 instance): sudo /usr/bin/puttygen my-ssh-key.pem -o my-ssh-key.ppk NOTE: If you want to use SFTP and connect to an EC2 Instance with Filezilla, Filezilla also uses the same PPK file. This website has further information on using SSH keys. |
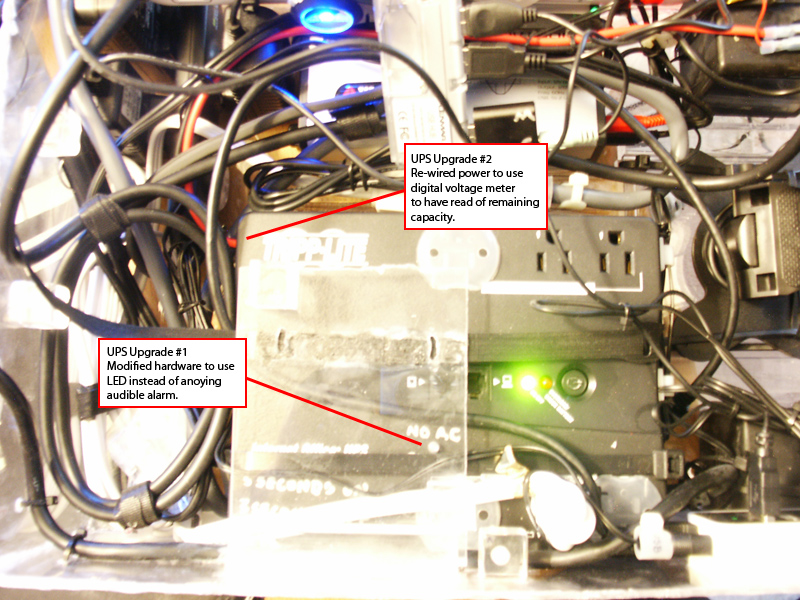 |
With this Raspberry Pi 2 project one of the goals was that of using a UPS (for power backup when main power was unavailable). As well, being able to use DC power (such as from a vehicle). The photo shows the UPS (and above that the DC Inverter). What is relevant to note here is the UPS needed a few hardware "revisions" to integrate a DC voltmeter as well as replacing the anoying alarm buzzer which seemed to be almost as loud as a car horn. |
 |
A frontal view of the project shows the voltmeter after it was wired into the UPS. |
 |
This photo shows the placement of the Raspberry Pi 2 (with its own custom case and cooling fan) in the larger Raspberry Pi 2 case holding the audio, UPS, and assorted components. |
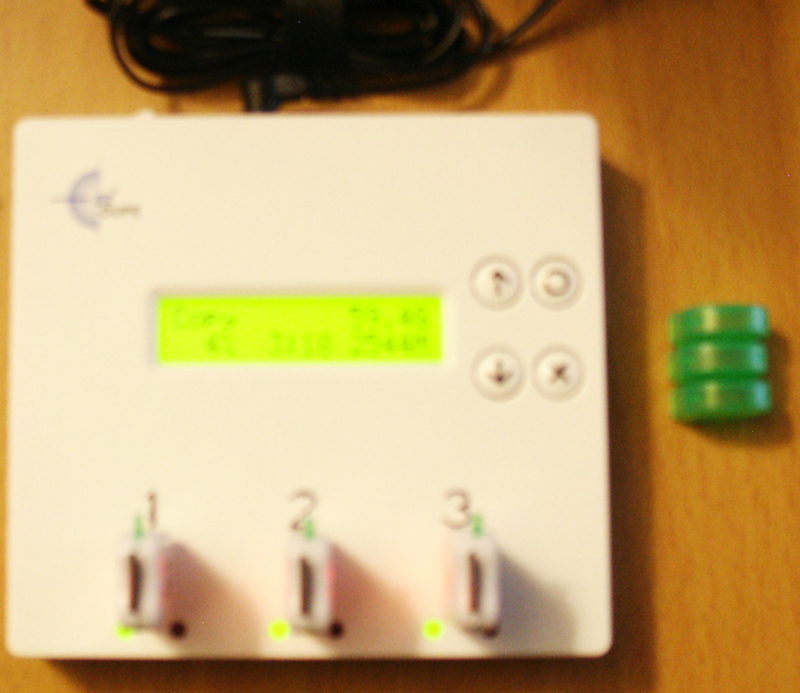 |
Probably the easiest way to back up the MicroSD cards used in the Raspberry Pi 2 is to use Ez-Dupe hardware. This hardware makes it quite easy to create exact clones of the MicroSD cards (not to mention can be used on other USB 2 media). This is older hardware and the manual only indicated they had tested it up to 16GB, but I found that it created clones of the 64GB MicroSD cards just fine and usually taking less than 2 hours time to do.
If you would like to use a simple piece of hardware to make backup copies of the MicroSD cards, then you may want to get the following: Portable USB 2 Copy Duplicator & Tester UB030461880 Manufacturer website |
